This is the perfect way to use up all those random pieces and leftovers from past projects. Goodness knows I have 3298478489123million odds n' ends waiting to be used. I've been meaning to make a cluster bracelet for some time...so when I found this wide silver cuff bracelet at H&M, I knew it'd be perfect. It was actually in a pack of 2, for only $9.95. They had gold as well, which I'm thinking I'll need to pick up for future projects. You can always use a vintage cuff bracelet, too!
Supplies:
- Metal cuff bracelet
- Buttons, cabochons, beads, flat stones, stud earrings
....everything and anything.
- E6000/super glue
- Pliers, if you needed
1) If you're using some old earrings, use your pliers to cut off/pry off the backs, to create a flat surface to work with. I never wear these red studs, so this DIY was perfect for them.
2) Figure out the general placement of your pieces. This will probably change as you go along, but this will give you a broad idea of how you want to go about it.
3) Glue away.
4) Keep gluing...
5) Towards the end I decided I need more gold/brass, so I found some faceted rectangle pieces to throw in. Keep an open mind and be ready to possibly go back through your stash of supplies for some extra components.
Let dry, and you're good to go.
Next DIY is a clothing reconstruction. If there's anything I love about spring and summer, it's the warmer weather and the DIY clothing opportunities that come with it. I love making and altering clothes for this kind of weather, so keep an eye out for more clothing projects in the next few months.
My Friday night is going to be spent in, just relaxing. It's my first weekend in the past month that I'm NOT out of town...& while I love visiting people, it's kind of nice to take it easy this weekend. Time to curl with a glass of wine and a good movie.
Hope everyone has a great weekend <3!
xo,

One step DIY's are the best. Am I right or am I right?
I recently made this scarf into a more wearable piece of clothing, by simply cutting two slits. It's all about
where you cut the slits. The best part: you can still wear it as a scarf if you wanted to.
Some of you might also recognize it from the
pictures I posted from the ReadyMade Magazine Party. My style is more on the casual side, so this scarf vest is a perfect way to dress up an otherwise plain t-shirt.
I used a 30x30 vintage square scarf. It's already on the bigger side of scarves, so I'd recommend finding the largest square scarf you can find. For reference - I'm about 5'2", and you can check out the pictures above to see how a 30x30 scarf vest fit me. It'll all depend on your height, your preference, and the scarf you use, but the pictures above will help you gauge how your finished piece will look.
Supplies:
- Large square scarf or fabric
- Scissors
- 3 minutes of your time
First and only step: cut two diagonal slits on either side of the scarf's midpoint.
That's it!
Don't worry about making everything perfectly straight. You can tell just by looking at the above picture that I didn't even cut them straight, either. When worn, the scarf will flow and fold within itself - so being a few inches off won't matter at all.
I eyeballed this and didn't measure anything before hand, but I understand that's not everyone's style. SO if you're still hesitant, check out the diagram below. I included measurements for my particular vest, but keep in mind that it was done on a 30x30 scarf. You can always adjust accordingly depending on the size of your scarf.
(Click to enlarge)
You don't even have to use a scarf if you don't want to. If you have a large piece of fabric laying around...by all means, make that into a vest, too!
Thanks to
Jenni from I Spy DIY for helping me snap these pictures!
Again, don't forget to check
M&J Trimming's website tomorrow, Tuesday May 17, to see the DIY's that I made with their
surprise box of supplies.
Also happening this week: meeting up with
Glamour Kills Clothing, and an interview I had with
Smashion will be also posted.
I've received a good number of questions for the Q&A video I'm doing soon, so if you haven't already - feel free to send a question kirsten.studsandpearls@gmail.com or leave a comment below.
xo,
had so much fun creating these projects with the surprise box that M&J Trimming sent me. There’s a lot of variety within these 6 projects, so I hope you’re inspired to try out at least one of them! Enjoy, and Happy DIY’ing!
_____________________
Project 1: Multi-Finger ring
Multi-finger rings have been spotted everywhere lately. As one of this season’s hottest trends, you can make your very own multi-finger ring with just a few supplies.

1) Fold the scrap pleather/leather in half, lengthwise.
2) Glue along the inside.
3) Remove the shanks from the back of the buttons.

4) Glue the buttons onto the rectangle.

5) Glue the ring blanks on the back of the rectangle.
6) Let dry.


_____
Project 2: Chain and Cord Bracelet
This statement bracelet looks complicated, but it really isn’t! I love the combination of different textures, between the chain and the cord.
Tip: Wrap tape around the ends of the cord to prevent them from fraying while you make the bracelet.

1) Cut the cord into two 30 inch pieces, and thread one piece through the first link of the curb chain. Fold the thread in half to make sure that there’s the same amount of thread on either side. Take the bottom strand, fold it over the top strand and then through the second link.
2) Take this strand and fold it back over the chain, and under the other strand. That other strand then goes through the chain.

3) Repeat steps 1-2 until you reach the end

4) Thread the other piece of cord through the first link of the chain, and repeat until you’ve braided the other side.

5) Sew the ends together, and sew on the button to accent the bracelet.

6) Sew the clasp onto the cord, trim the ends and secure with clear nail polish to prevent fraying.

_____
Project 3: Ribbon Wrap Bracelet
This Ribbon Wrap Bracelet is the ultimate spring accessory; it totally reminds me of flowers, sunshine and nature. You can also use the same method with different types of ribbons to create a completely different vibe.

1) Fold the ribbon in half about 4 times. You might need to fold more or less times depending on the size of your wrist.
2) Tie the ends together in a bow.

3) Wrap a 1.5 inch piece of rhinestone trim around the bow, and secure with hot glue.

____
Project 4: Shoulder Trim Shirt
You can give some life to a plain old shirt by using gold trim to accent the shoulders. I love the way the trim hangs off the sleeves – it adds a sultry, flirty element. Regardless of what color shirt you choose, the gold trim will look amazing with any color.

1) Find the seam on the shoulder of your shirt. Line the trim along the seam and sew the edge of the trim to the edge of the shirt.
2) Sew the trim in the middle, with just a one or two simple stitches.

3) Sew in a few more spots along the trim.

_____
Project 5: Gold Trim Headband
This headband is my personal favorite; it can add some gypsy-inspired flair to any outfit, and will look great whether you have short or long hair.

_____
Project 6: Thread Tassel Keychain
Tassels are one of the hottest trends right now. You can easily make your own tassel with some thread, a pair of scissors and a small book. The best part? You can even use different colored threads to create fun, multi-colored tassels.

1) Create your own skein of thread by wrapping the thread around the book, about 40-50 times.

2) Slowly slip off the thread and tie the top section off, with a spare piece of thread. This will form a loop.
3) Attach the tassel and horn pendant to a key ring.

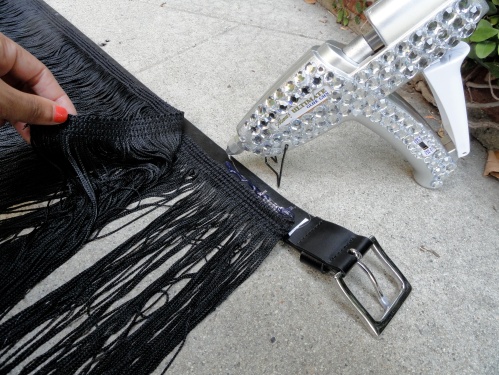
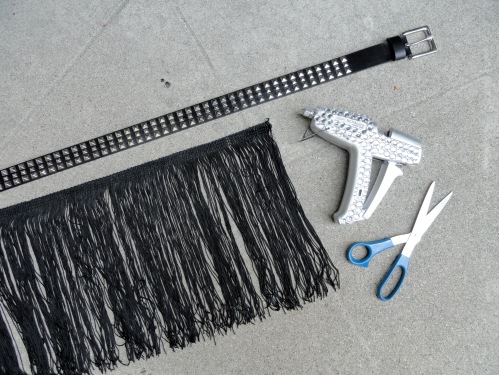
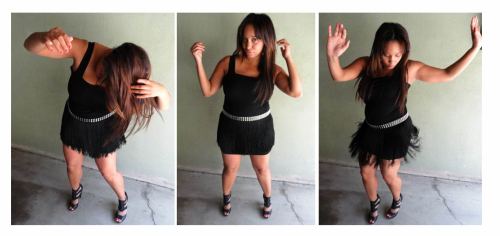
 Glue two rows of fringe to the back of the belt. Let dry, then wear over a skirt and shake your groove thang!
 You can use any color fringe and wear over any color skirt. Using the ombre fringe could also be an added bonus. The sky is the limit!
 So sah die Bluse ursprünglich aus.
 Alle typischen Merkmale einer Hemdbluse, also den Kragen, die Knopfleiste und die Taschen (falls vorhanden) abtrennen.
  Die Ärmel bzw. die Manschetten auf 3/4 Länge abschneiden.
 Nun werden die beiden vorderen Kanten an den typischen Kimono-Schnitt angepasst. Dazu die Bluse am besten vor dem Spiegel (oder auf der Schneiderpuppe) anziehen und einen weich abgerundeten Kantenverlauf mit Stecknadeln fixieren. Die Kanten für das spätere Einsäumen umgeschlagen und kürzen.
  So sollte die Bluse aussehen.
  Absteppen. FERTIG!!!


