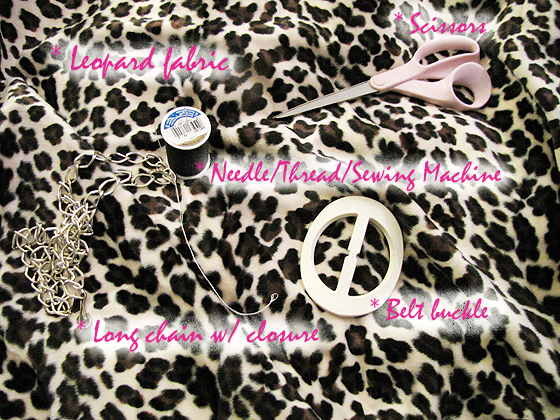
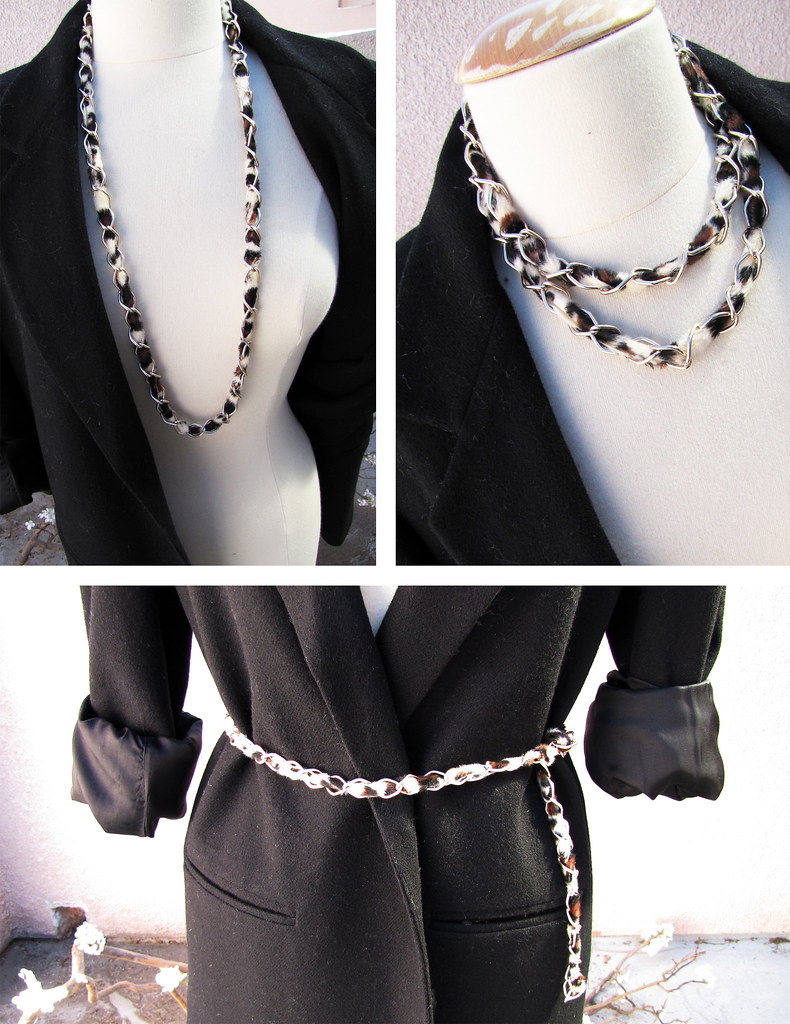
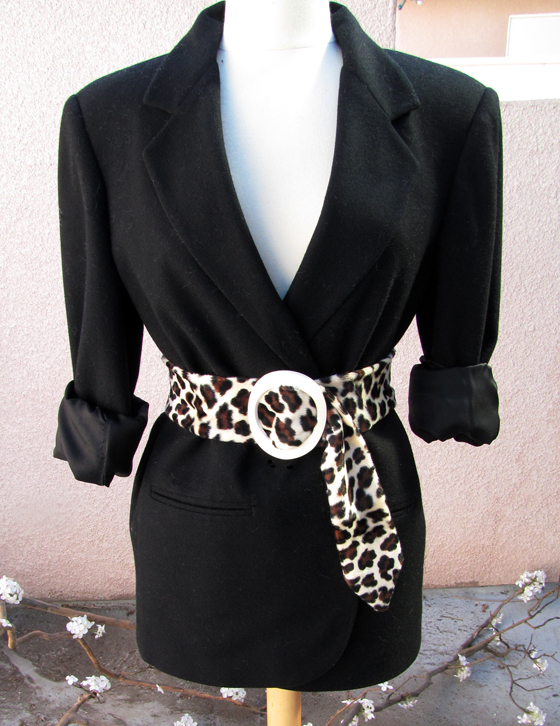
Leopard Belts, Chains, Accessories DIY
enlarge for detail
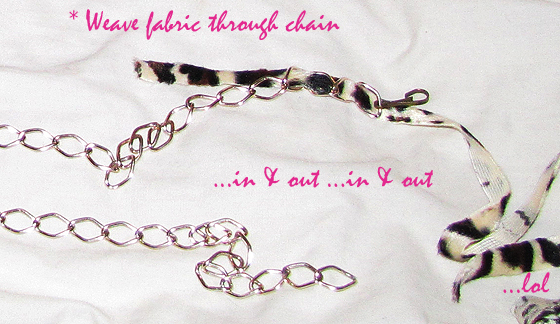
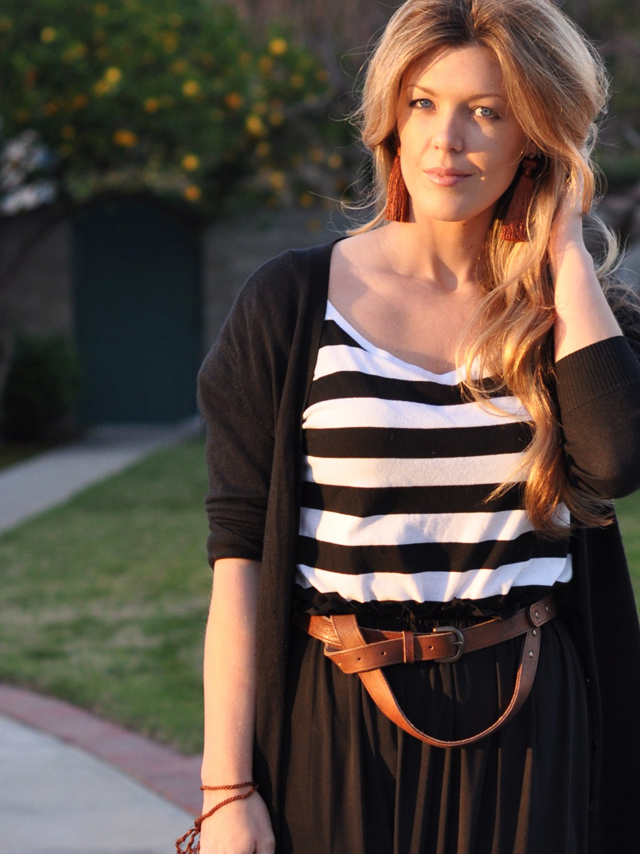
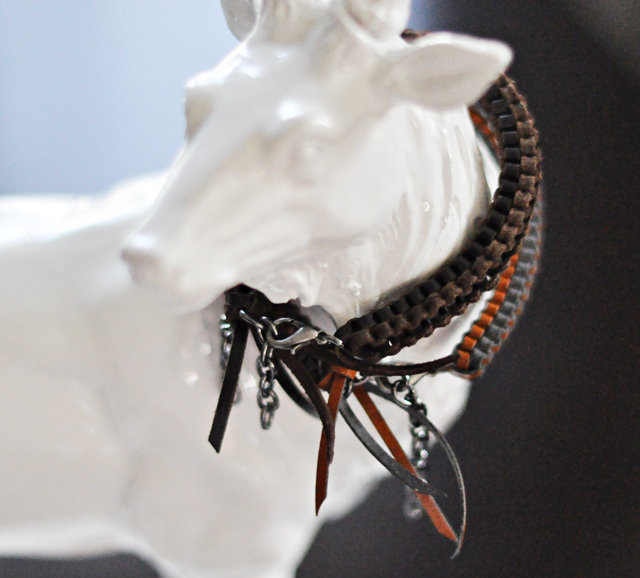
. . . wrap it around your wrist or boots!
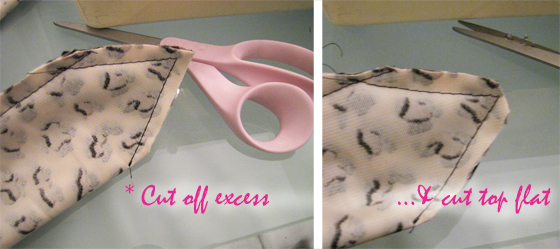
* Notes
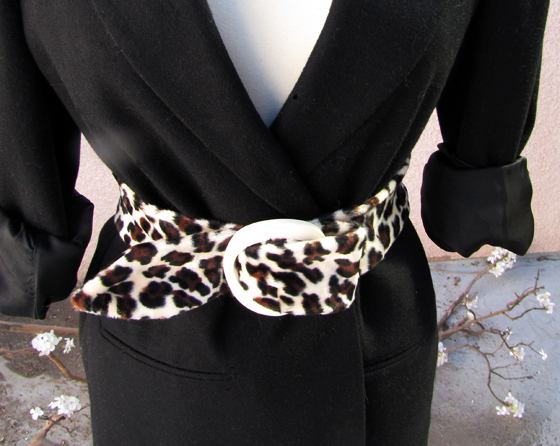
* I used a vintage plastic buckle that I've had for years, just lying around. I think it originally came attached to a fabric belt that matched a vintage dress.
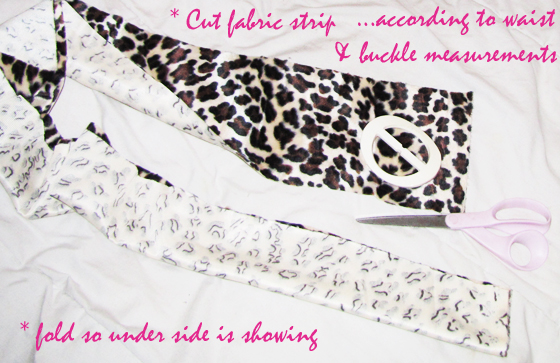
* You can purchase belt buckles like this at your local fabric store ...and actually loving the last two in the top row {follow link}. I may have to go grab that octagon one. It would have looked awesome with this leopard fabric {which I found as a remnant a while ago at JoAnn's -my local fabric shop}
* You can also use a man's tie for the second belt.
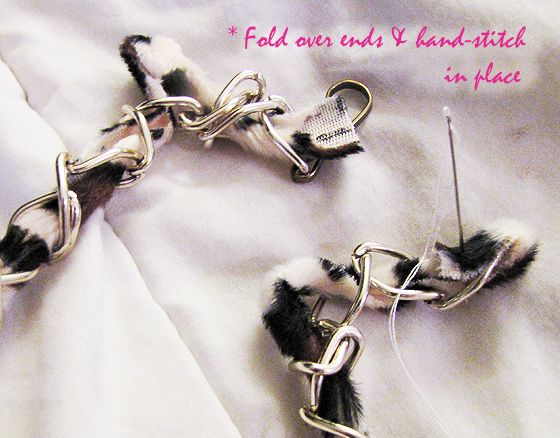
* These are both really simple DIYs. Less than 30mins each.
* Apologies for some dark/grainy shots. This is what happens when I wait until the end of Sunday to begin my DIY ...instead of in the daylight.
Have Fun!
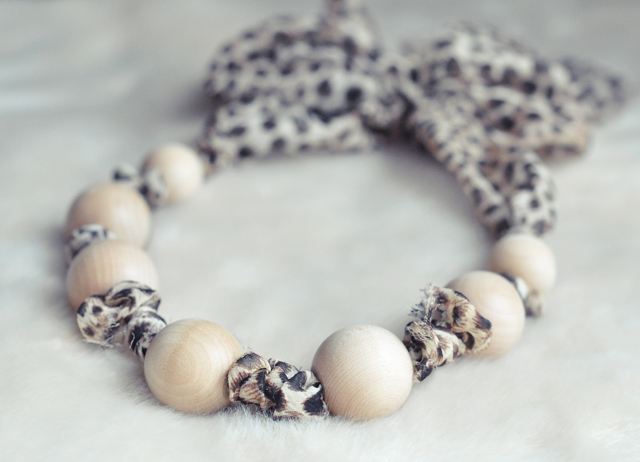
Maeg-it Yourself Wood Bead & Chiffon Anthropologie Orb Necklace
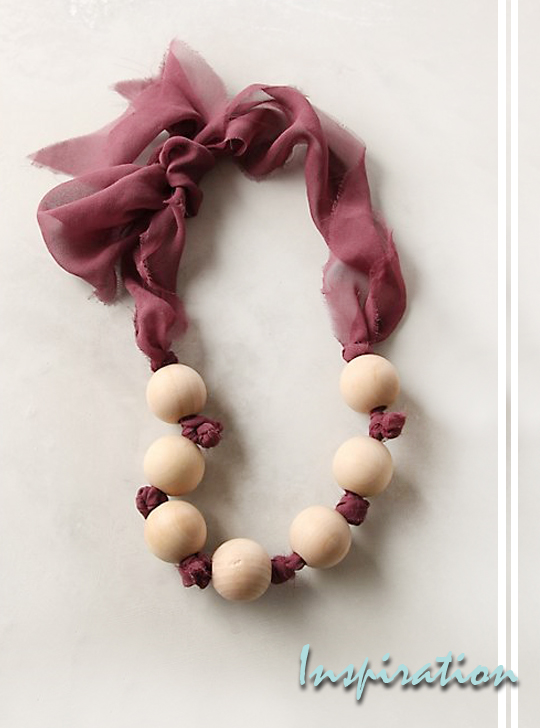
I've had this Incredible Orbs Anthropologie necklace saved in my "potential diys" folder on my desktop for months and months now. What's stopped me from making it? Well, at $20, it's a relatively inexpensive piece to buy ...so why wouldn't you? However, it's so cute and SO EASY and really, even more inexpensive to make yourself it's almost a crime not to show you how ...not to mention, it's kind of a perfect little necklace for Spring!

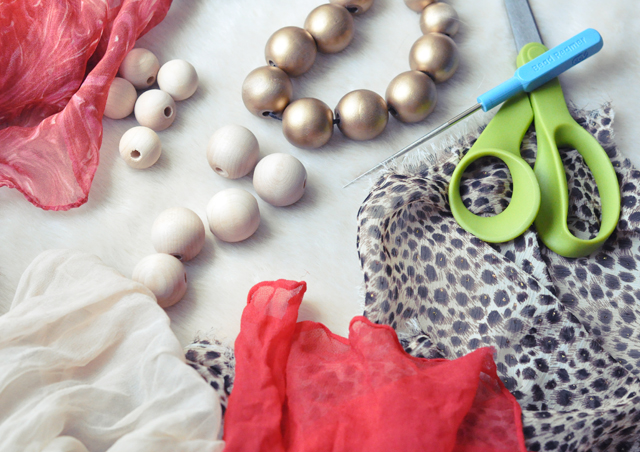
* 5-7 large Wood Round Beads
* Silk, Chiffon, or Sheer fabric or scarf ...you may choose to use ribbon but it won't give you the fluffiness or raw edges that a sheer fabric or silk will, though could be just as cute.
* Scissors
* Bead Reamer or a stick would even work ...something to help push the fabric through.

* I'm using a bit of this sheer animal print that I've been wearing as a scarf & alternately using in our game room on our mic stand ;) Because I'll only need a few inches of it, I'll still be able to keep it as a scarf. This is one yard.
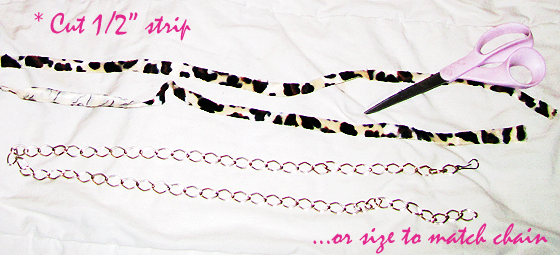
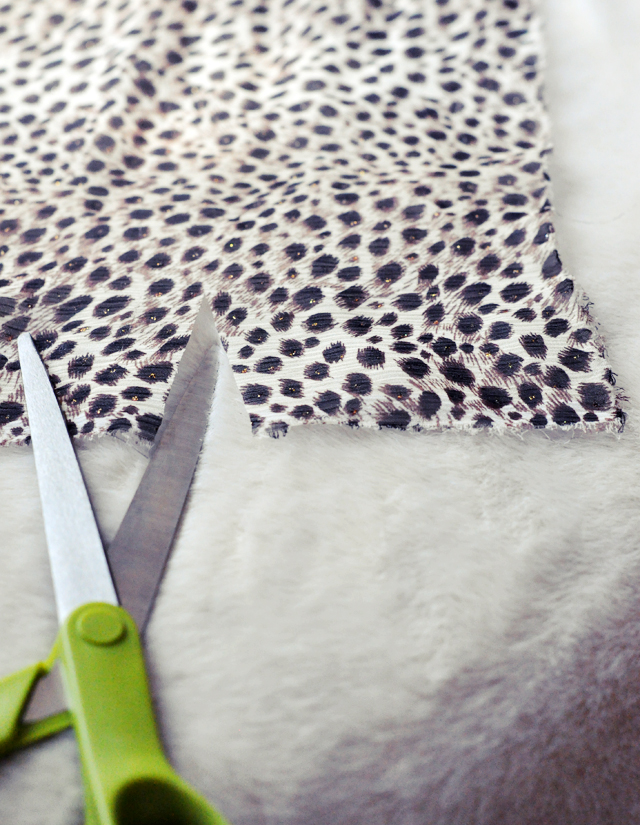
* Cut a 1" slit in your fabric, against the selvage, not parallel to it, about 2-1/2" wide
* Using your hands, tear the fabric from the slit to the end.
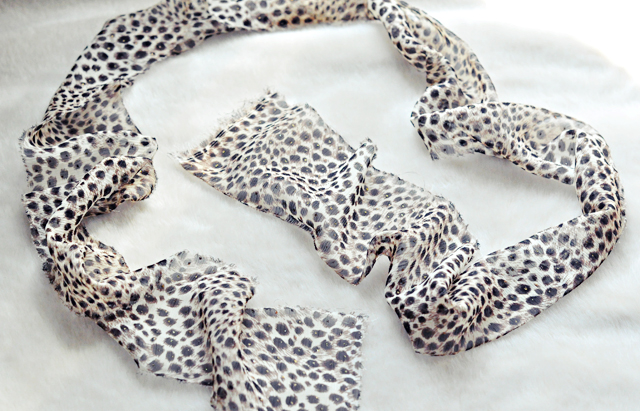
* You'll get a perfectly straight line and some beautiful fraying of the edge.
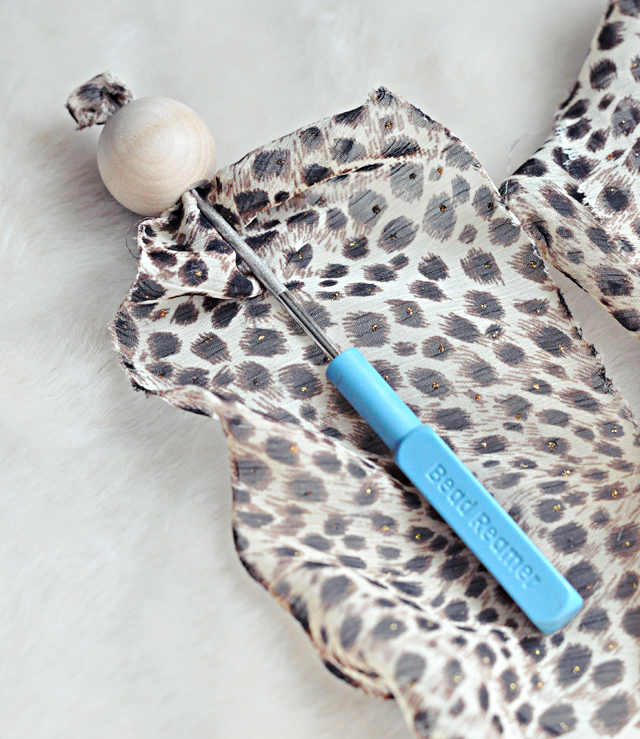
* The holes of my beads are fairly small ...so using a bead reamer, I pushed the fabric through.
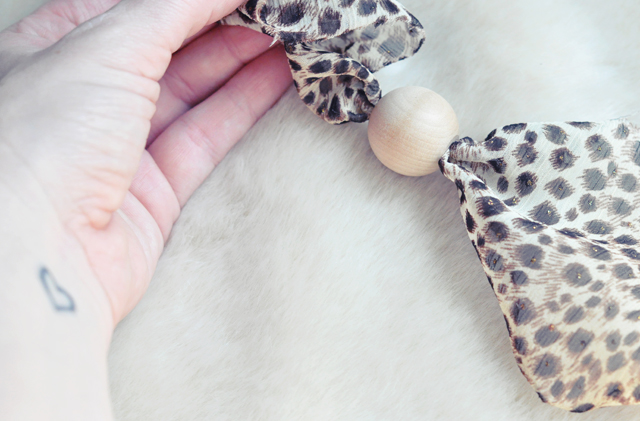
* And pull the fabric through the bead.
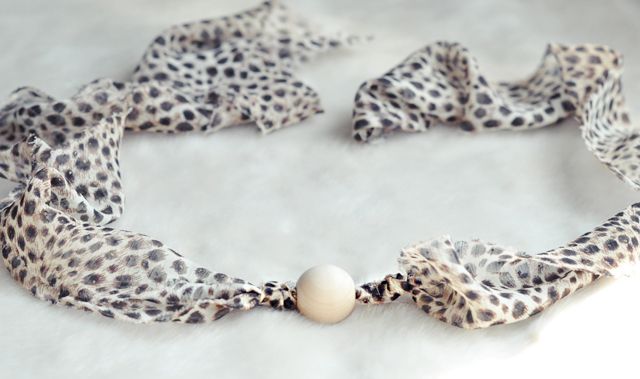
* Since I used 5 large beads and 2 small beads, one at each end, I pulled this first bead all the way to the center and created a loose knot on either side.
* Working from the center out to the ends, and using the two smallest beads at each end, I created loose knots and a bit of extra fabric in between each wooden bead.
* Don't worry about the fraying ...that's the way you want it to look!


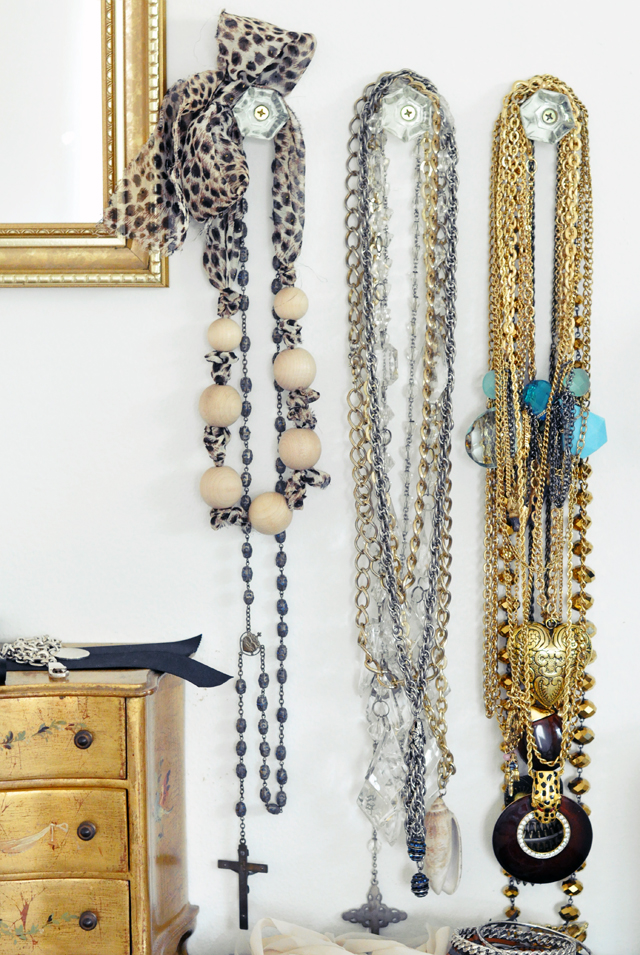
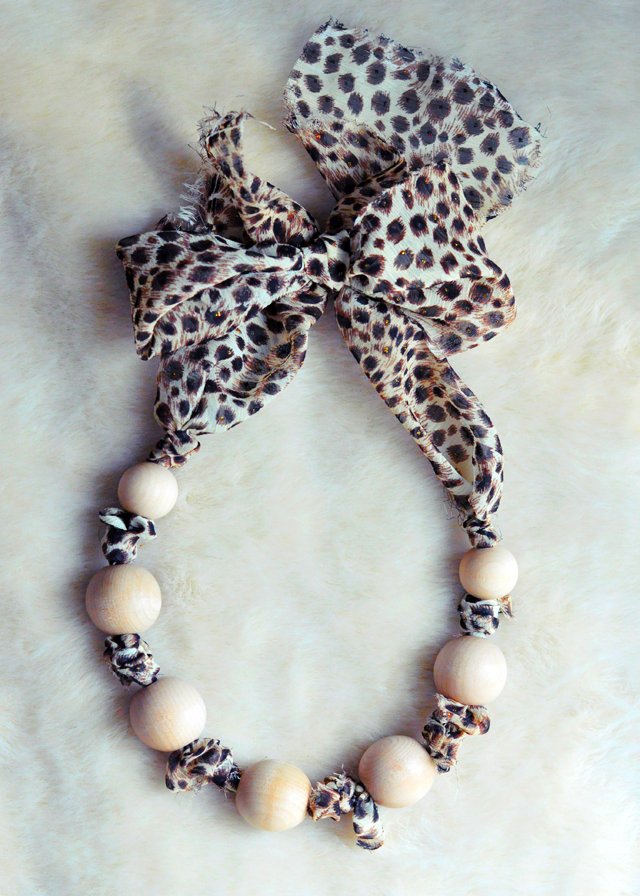
* Wear it short, long or somewhere in between ...it's super easy!
Have Fun!
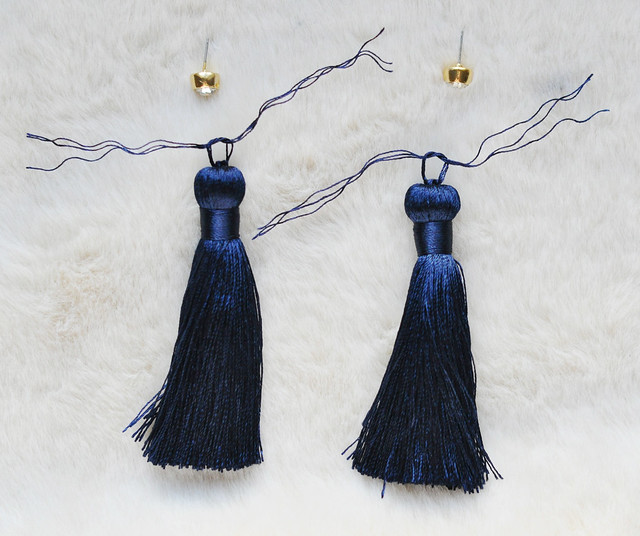
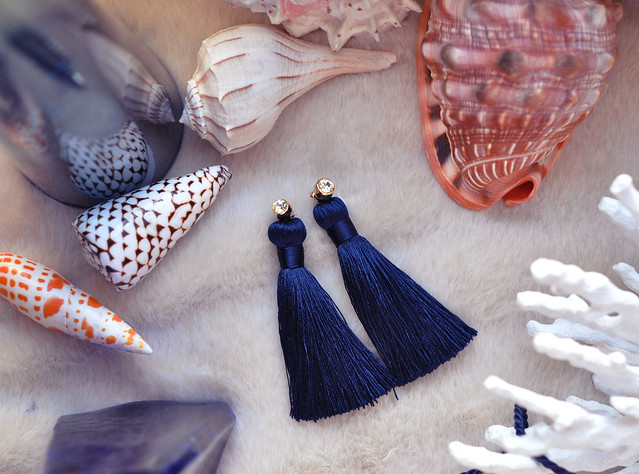
* Maeg-it Yourself Long Tassel Earrings *
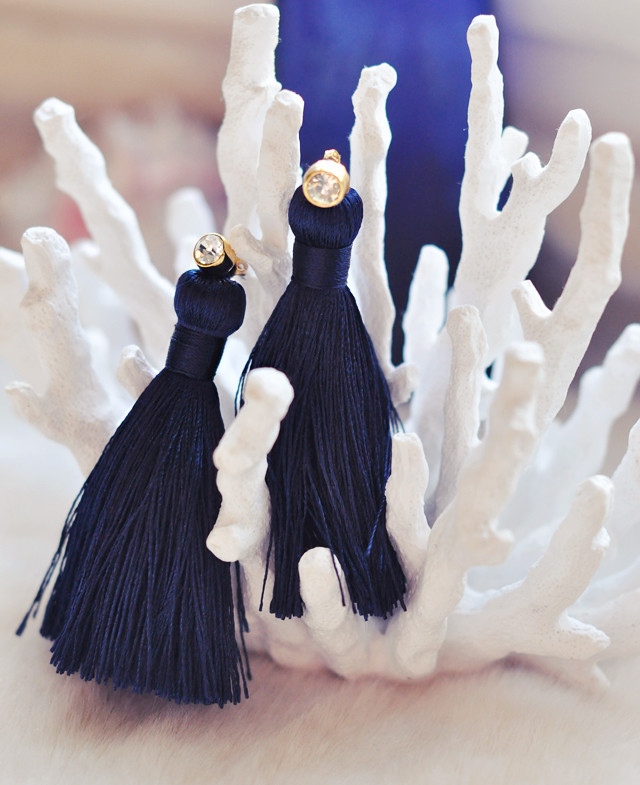
I MIY'd a pair chain tassel earrings back in August 2009 and have worn them enough to see a bit of tarnishing on the gold hooks and chain ...which doesn't bother me really. But since they're a bit shorter and well, dripping with chains, they have a particular style. And like many things, there are various different styles of tassel earrings.
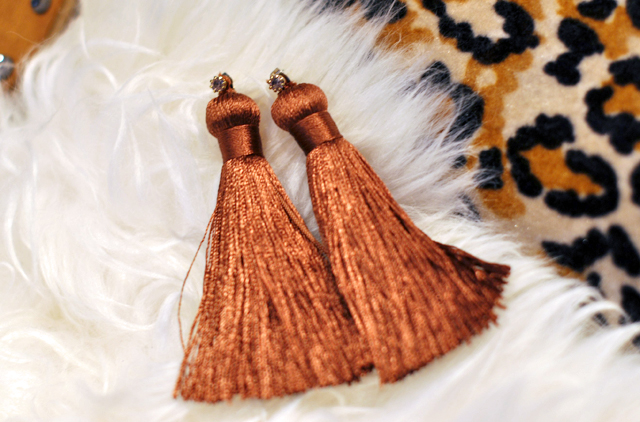
I picked up a few of these rope tassel tiebacks in different colors a while back on a trip to JoAnn's and thought I'd ultimately use them as necklaces. One morning, however, I needed a pair of cognac colored earrings, saw the rope tassel hanging from my mirror, grabbed it and a pair of stud earrings and left for work. Once at work, I snipped and tied them up into a cute pair of tassel earrings that tied my entire outfit together. It took about 5 minutes!
Since there are a handful of different tassel earring DIYs out there, {including the ever adorable Geneva from APairandASpare's neon duo and uber-cool OutsaPop's super long fringe pair I decided not to post my original DIY earrings. But because I got so many requests for it and since mine is a bit different, here it is. {it looks like a lot of steps but really, it's a 10 minute DIY}
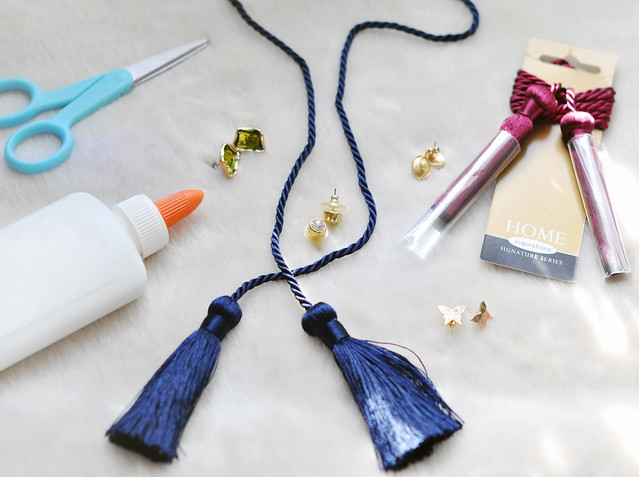
* Home Inspirations rope tassel tieback {found at JoAnn's} ...I like these in particular because they look expensive but are between $4.99 and $7.99 {I can't find them online}
* A pair of stud earrings
* Scissors
* Any kind of glue
* Choose stud earrings with long stems.
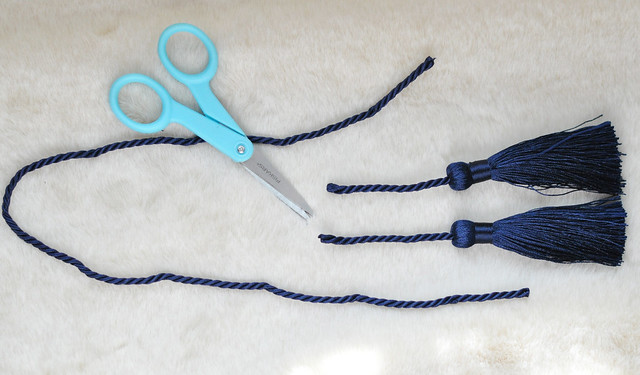
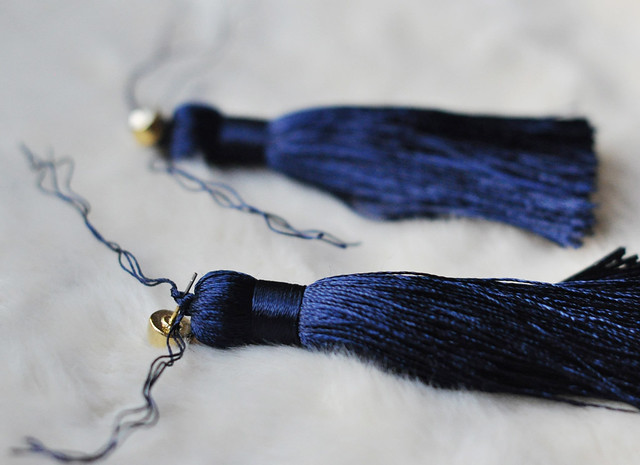
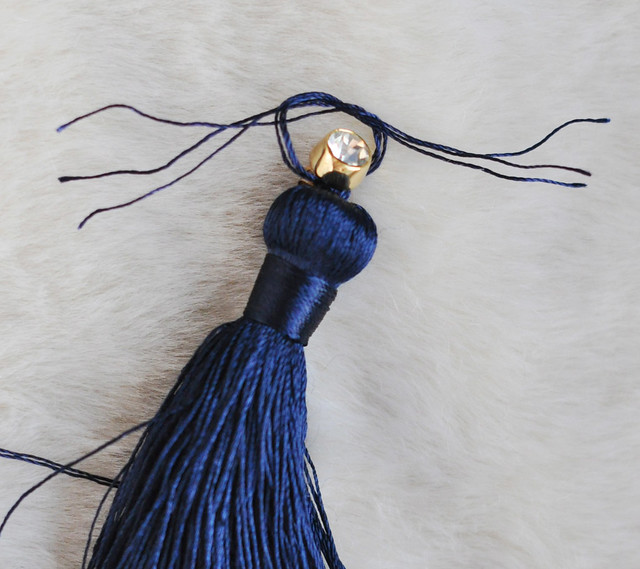
* Cut tassels from rope, leaving about 2-1/2" on each. {save the rope for a future project :}
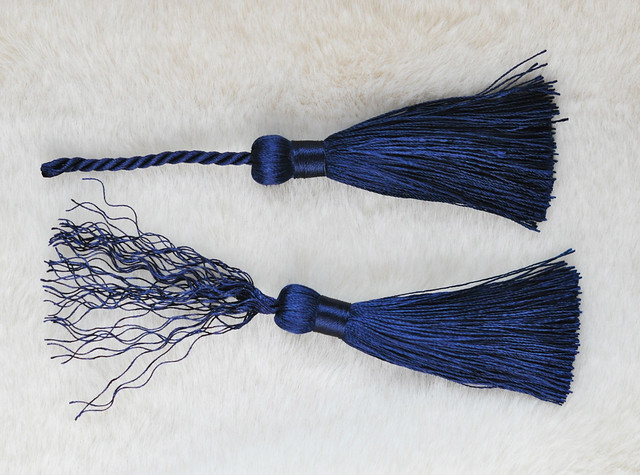
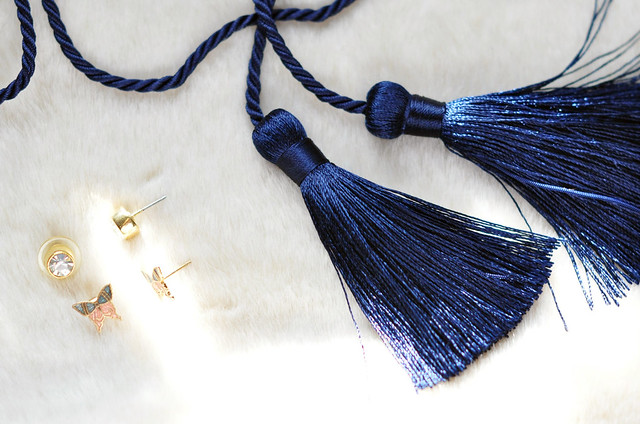
* Unravel rope.
* Find three strings on each side closest to the edge and to each other and separate them from the rest.
* Holding back the 6 strings you've separated, carefully cut the others out and toss away.
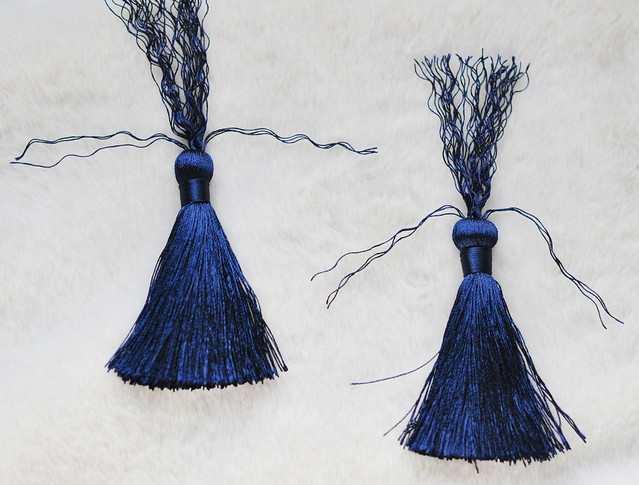
* Create a loose knot with remaining strings.
* Slip studs through knot and tighten.
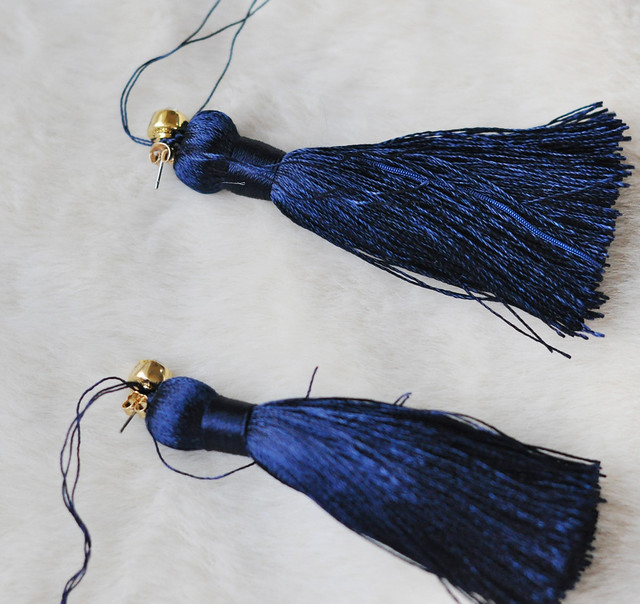
* Replace earring backs to hold your first knot in place.
* Bring string around the stem and knot again on opposite side of first knot.
* Bring rope around again to the opposite side {the first side} and tie another knot ...then tie one knot on top of that one and tighten all the way, leaving no visible length/strings between studs and top of tassel.
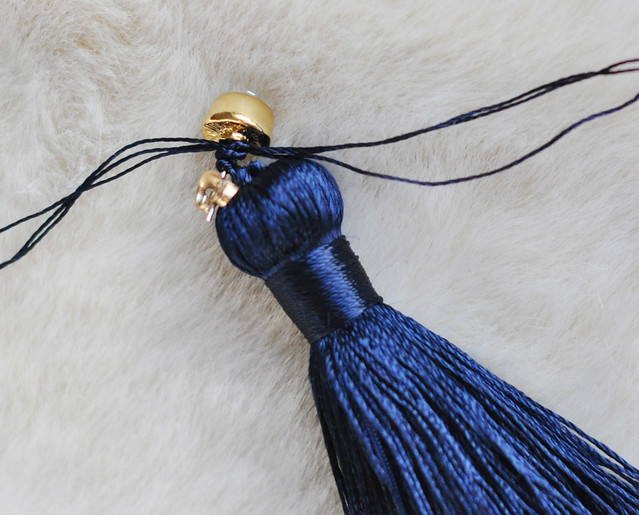
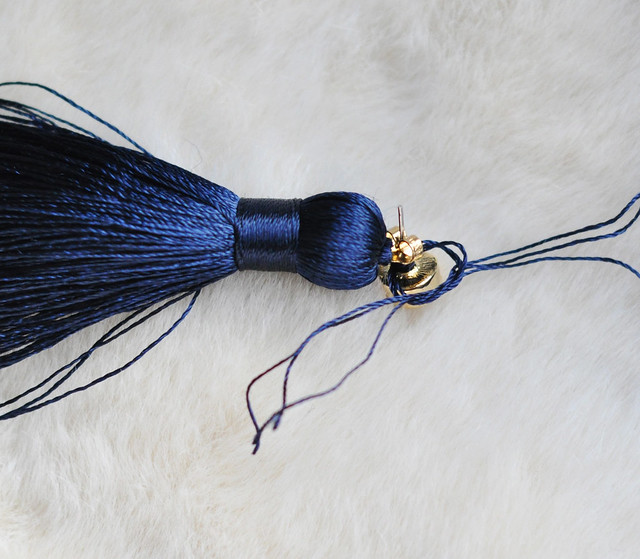
* Final knot
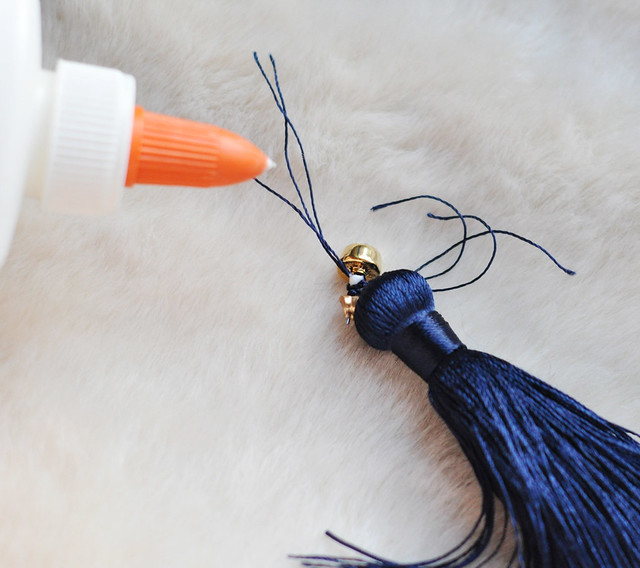
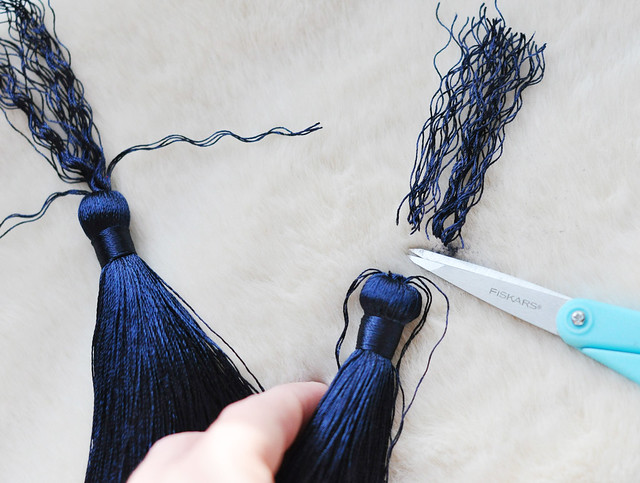
* Dab a bit of any kind of glue over the knots just to ensure they stay tied ...& let dry.
* Once glue is dry, snip remaining ends, leaving about 1/8 of an inch {unless your studs are small, then make sure no thread is visible from the front}
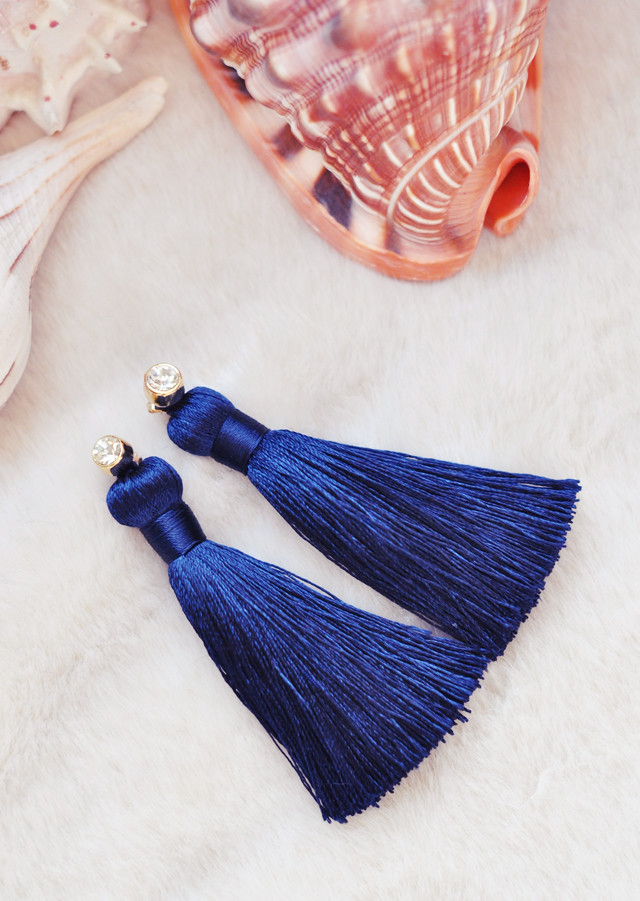
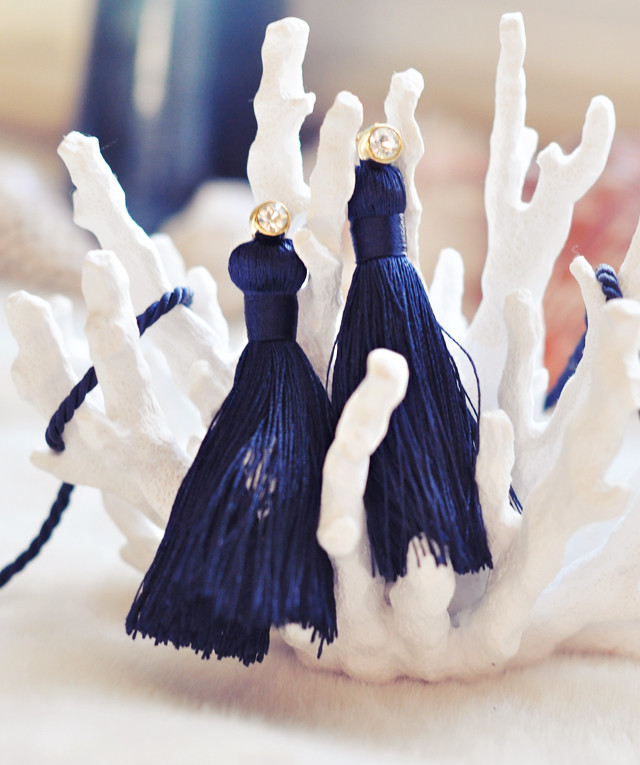
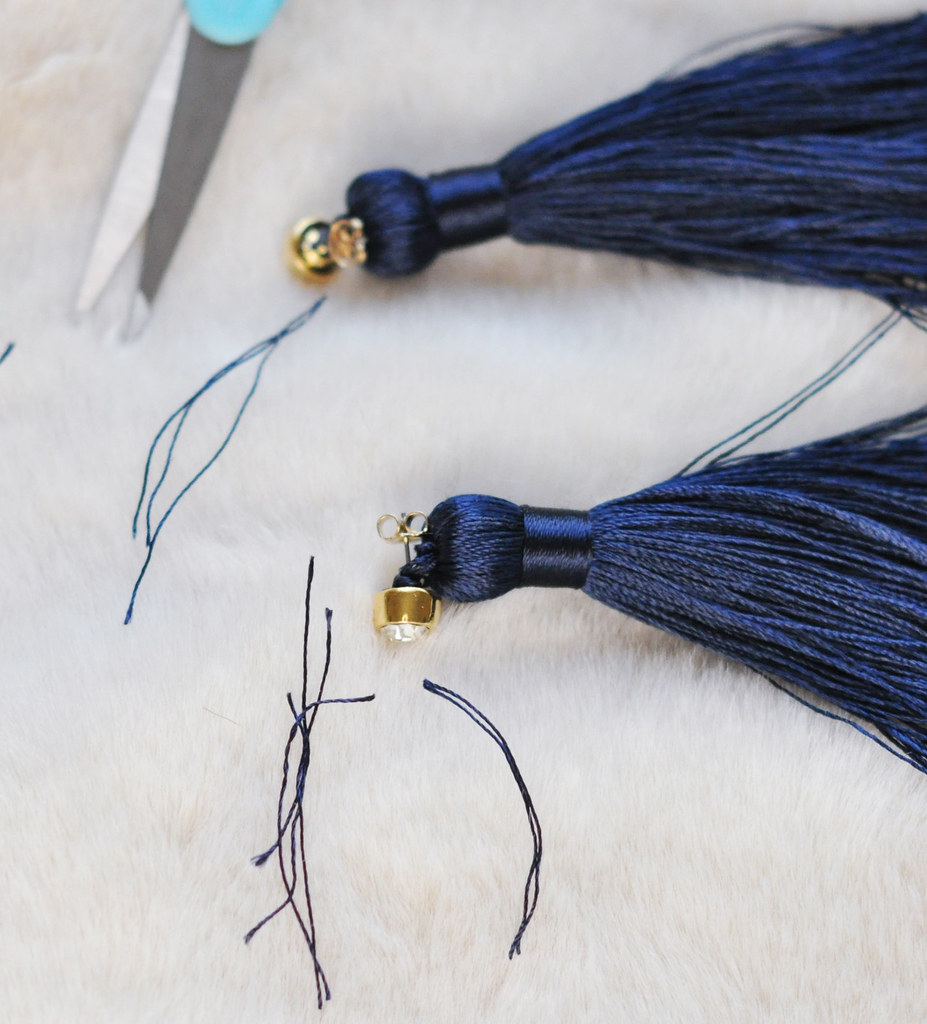
* Don't they kinda look like ladies in dresses? I love it!
And here are the originals . . . with much smaller studs, giving them an entirely different look than the glamourous feel the navy/diamond ones have above. I think what's most fun about this DIY is you can swap out any studs you like!
Have Fun!
Dip Dyed Nautical Rope Bracelets DIY

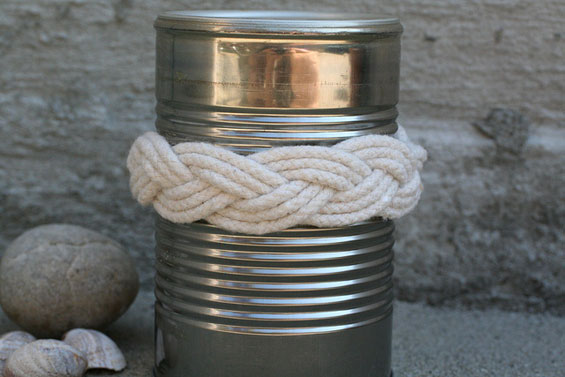
Perusing Lonny Magazine last week, I spied these adorable dip-dyed braided rope bracelets by Tanya Aguiniga retailing for $85 and thought, really, what an easy DIY this has to have been done already. And sure enough, it has!! It's not often I post other people's content but this was so great I had to share. So, without further ado, I give you Sailor's Knot Bracelets via Etsy's How-Tuesday. Check out The {NewNew} for more diys like this.
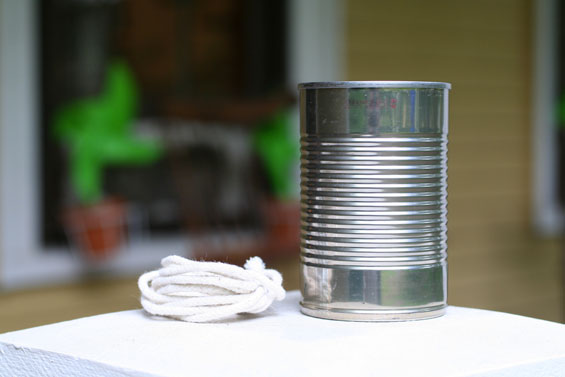
* 3.5 yards of rope.
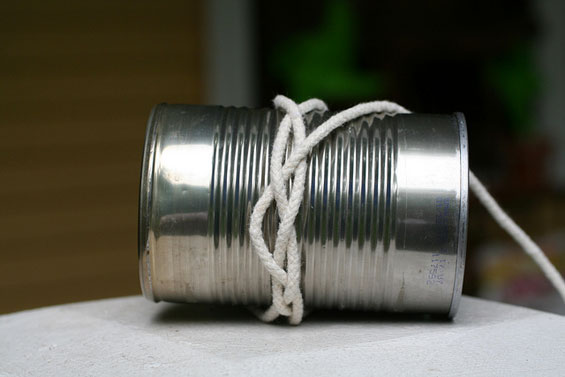
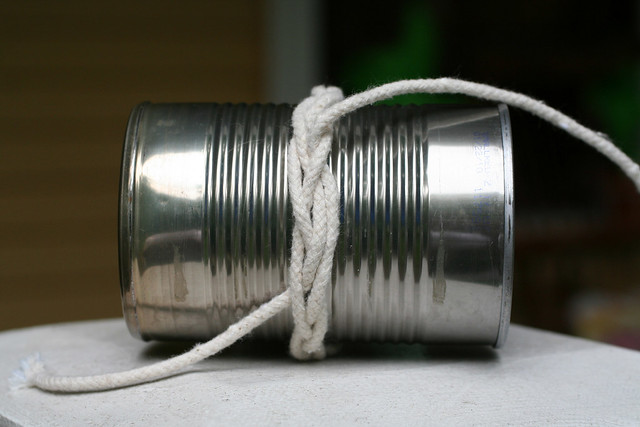
* 14 ounce can for a smaller bracelet or a 20 ounce can for a larger bracelet. Any other round object that has the appropriate circumference for your wrist will do.
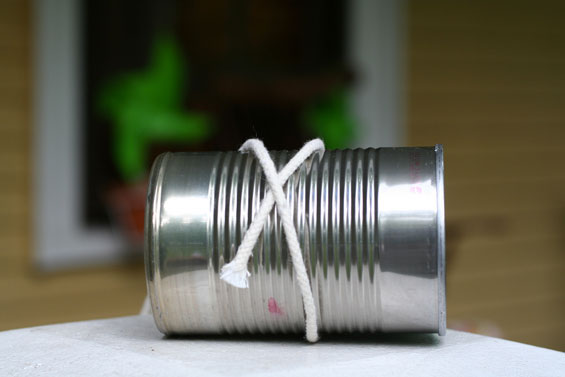
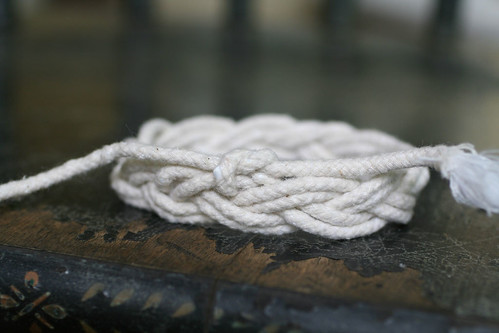
* Wrap one end of the rope around the can to shape an X. Leave about a 4" tail. You will need this tail at the end to finish the bracelet.

*Wrap the long end of the rope around the can again and bring it up to the middle of the X. Then pass the long end under the right, upper leg of the X and pull the long end all the way through.
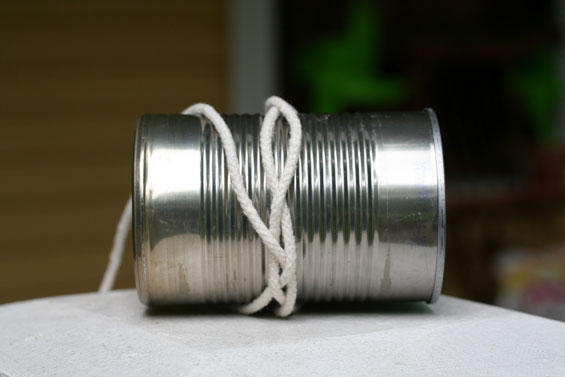
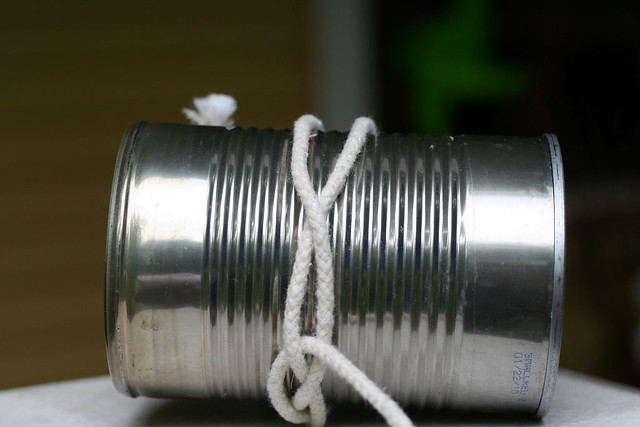
* Next, move the upper left leg of the X over the right leg of the X to create an oval shape.
* Pull the long end of the rope through the oval shaped opening you just set up.
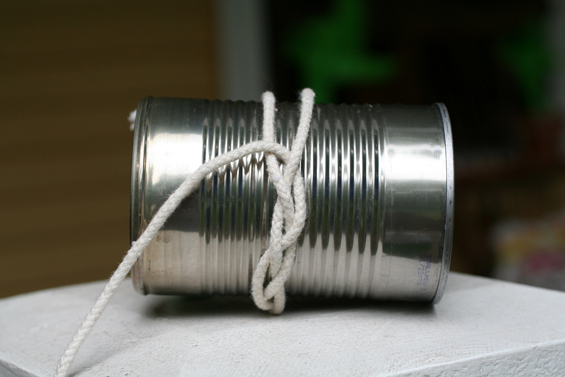
* Turn the can a bit and you will see that the oval shape has created another X shape. Again, pass the long end of the rope under the right upper leg of the X and pull the end through.
* Repeat steps 3 through 5 until you get to the beginning of your project.
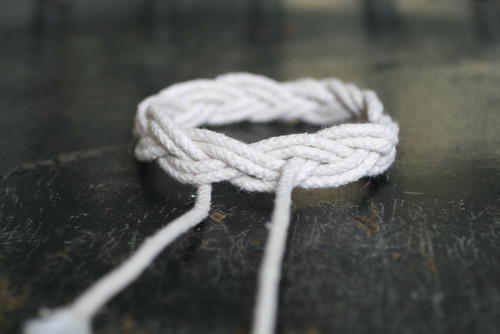
* You will now find a three-stranded braid. Follow the rope you initially laid out and create a parallel second line.
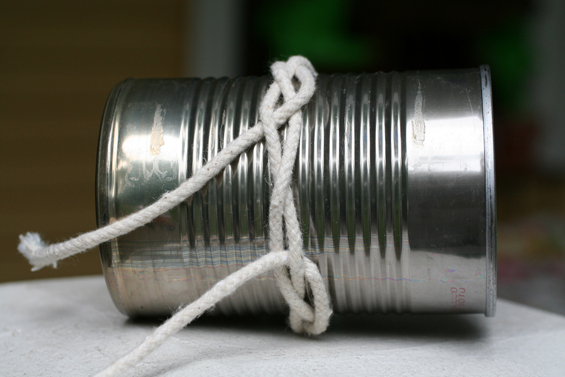
* Continue around the can. If you find that it's getting too tight to pass the twine through the openings, you may want to take the bracelet off the can and continue with the knotting in your hand. If you take it off, be careful not to pull the rope too tight, otherwise your bracelet will shrink on your wrist.

* Confused? Watch This or This
* My Notes *
* To really mimic the ones featured in Lonny, you may need a slightly thicker rope & a smaller can. Also, use This tutorial.
* To create the dip-dye and/or even an ombre effect, grab yourself some RIT dye, follow the instructions and just literally dip your bracelet half-way in the dye mix until you get the color you want. To achieve the ombre look, start your dip quick, in and out, then dip again a bit longer and lower down ...and so on, and so forth.
* These would also make really adorable NAPKIN HOLDERS ...so use a really narrow jar or maybe a toilet paper roll to make a smaller version.
* Instead of tying a knot inside, you can also hand-stitch it with a matching thread to make it flush
Have Fun!
* Leather Lanyard Bracelet Maeg-it Yourself *
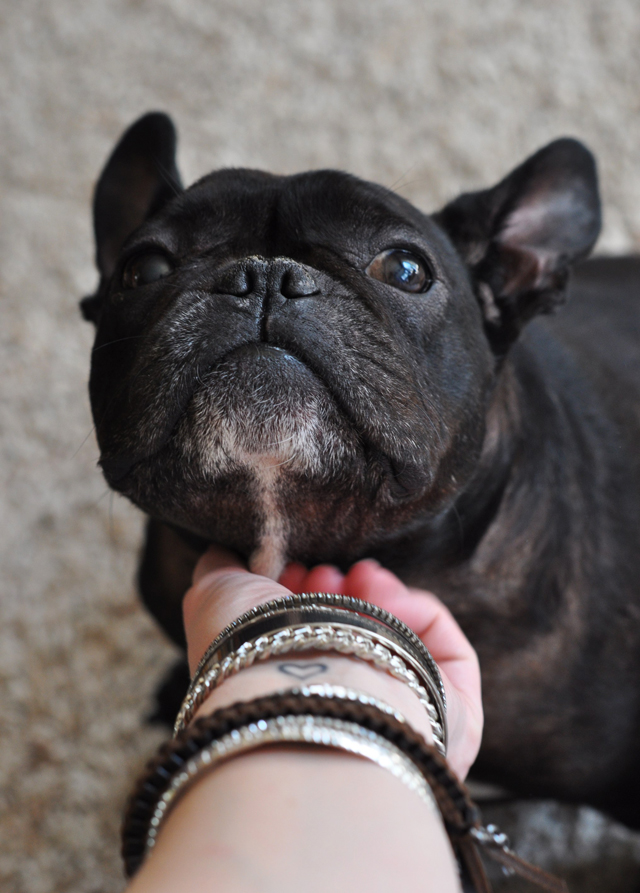
Okay, not the best shot of the bracelet, but I couldn't resist!
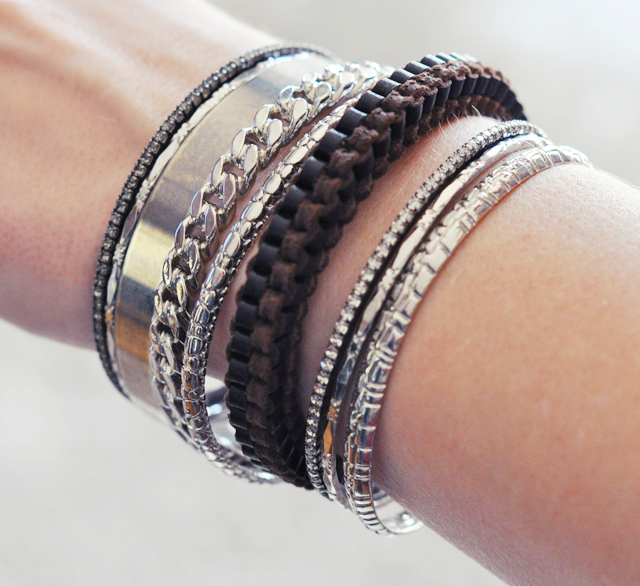
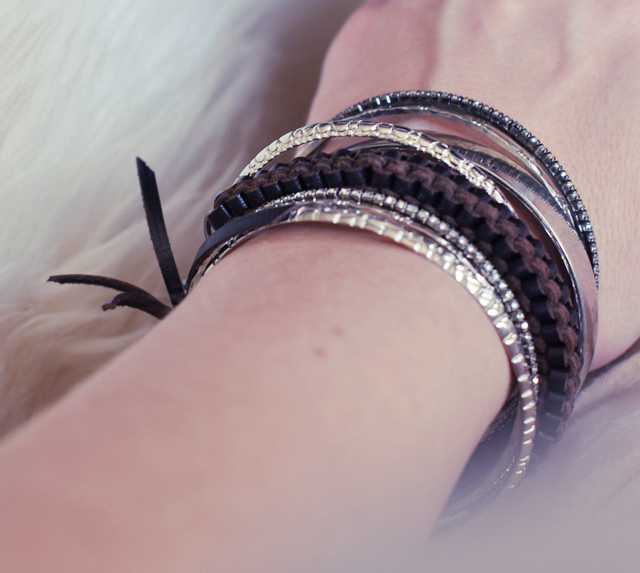
If you went to Summer Camp as a kid, you'll totally remember making lanyard keychains with that brightly colored plastic lace {I had tons of them!} ...so I thought, why not do it with leather lace? And I did. And I love them! Pair them with stacks of other bangles and bracelets to add a little texture! {p.s. you can also make this into a necklace, headband or belt as well}
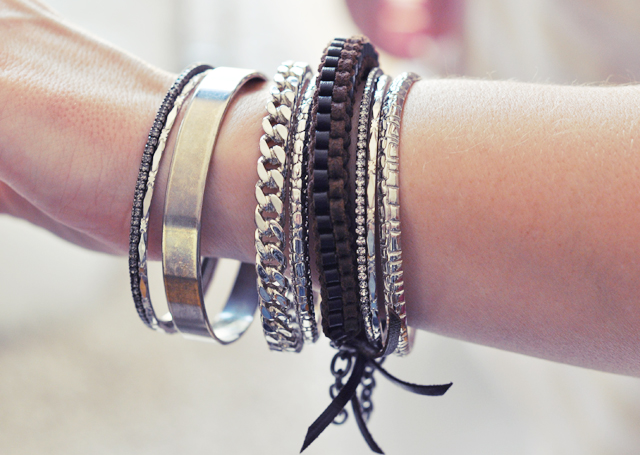
So I thought I'd show you how ...and if you like, you can buy one of mine because I've listed a few in my Etsy shop.
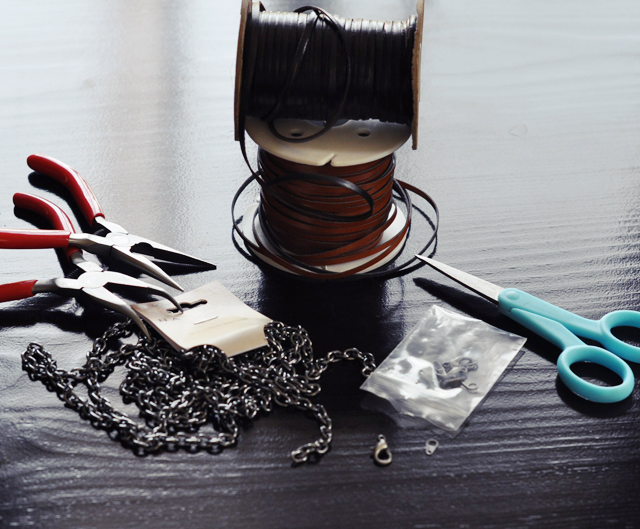
* Leather lace
* Chain
* Clasp
* Needle nose pliers/Scissors
NOTE: There are tons of lanyard making videos on youtube if these instructions are a bit confusing! - click here
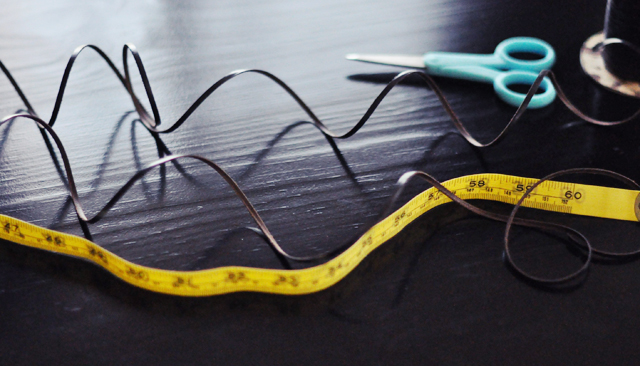
* Cut 2 strips of leather lace. Depending on your wrist size and how loose you want your bracelet, make them between 60 and 80 inches each. You can make up for a too short lanyard by adding extra chain but really, you want these to fit loose, like a bangle. So start with too much and cut away unwanted at the end.
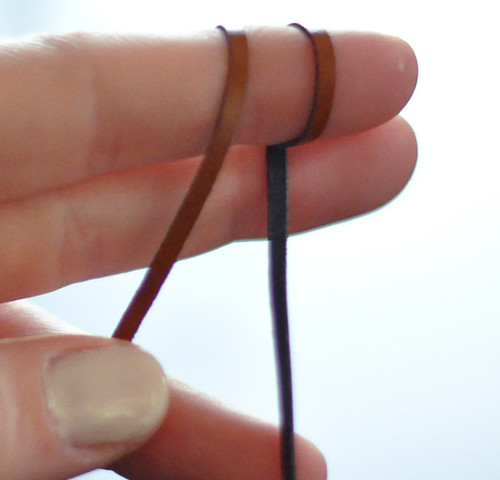
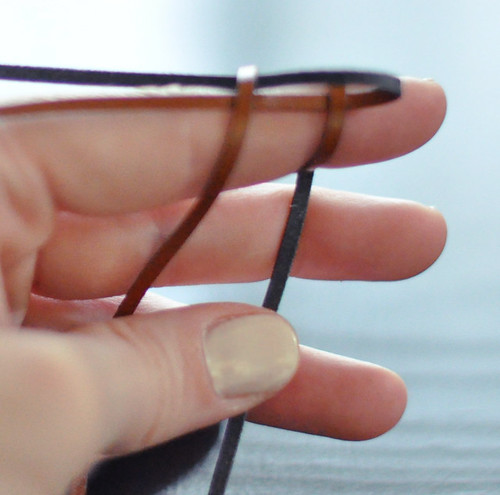
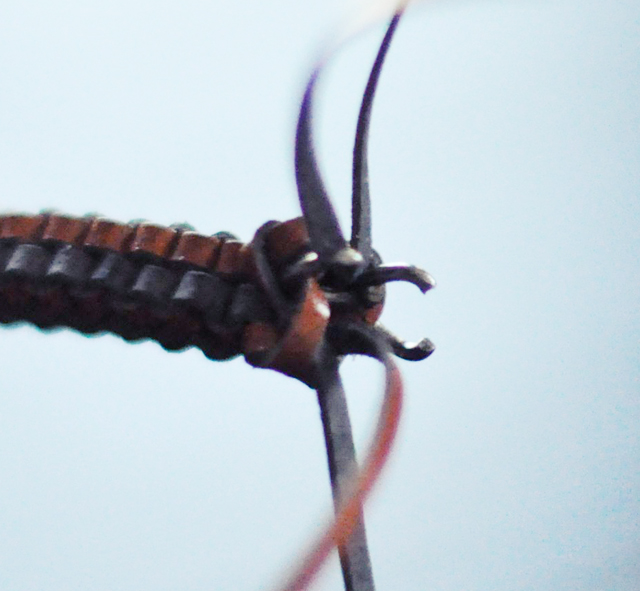
* To begin, find the middle of one of your laces and wrap it twice around your finger. Find the middle of your second lace, slide it under both loops, bring one side over and under then repeat with the other side ...slip off your finger and tighten
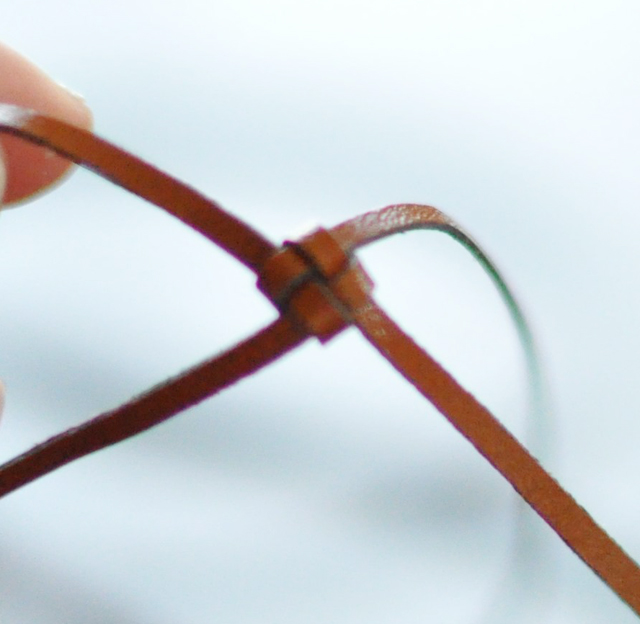
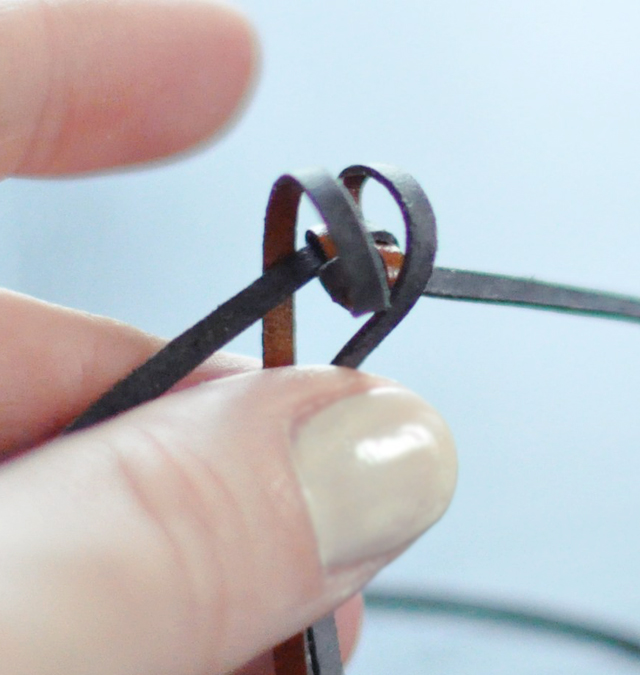

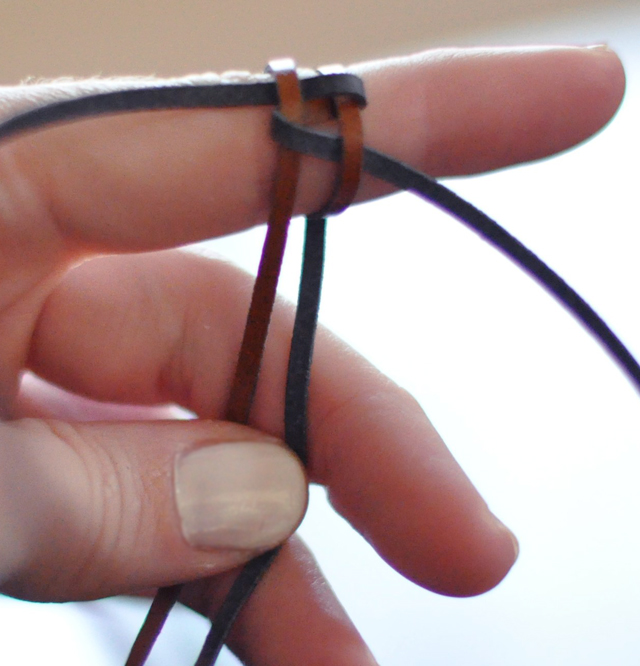
* Getting the first and last stitches done are the most difficult, so watch these videos for help, but otherwise it's just loop/loop opposing laces then loop over and under and over and under with the leftover laces, then pulling it tight.
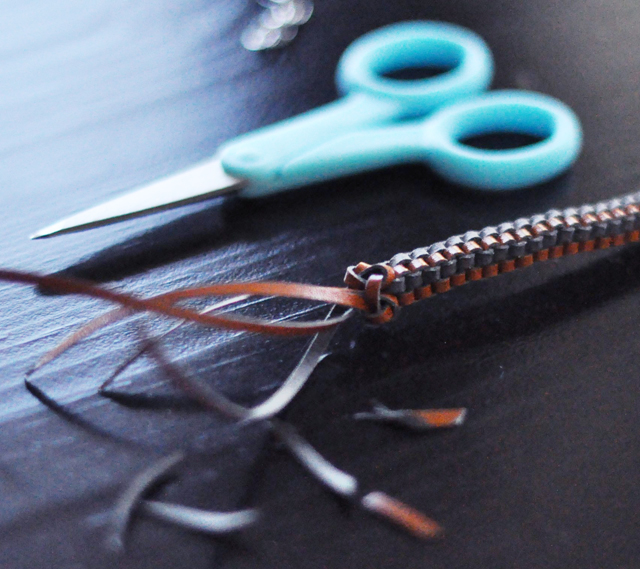
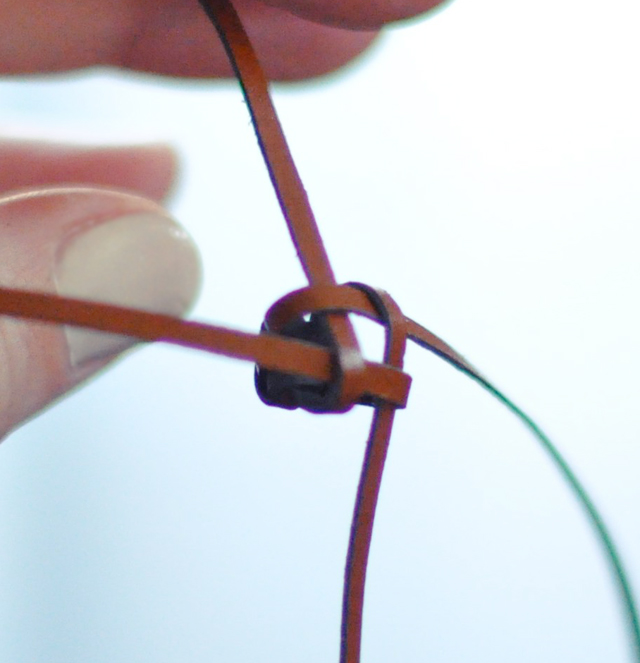
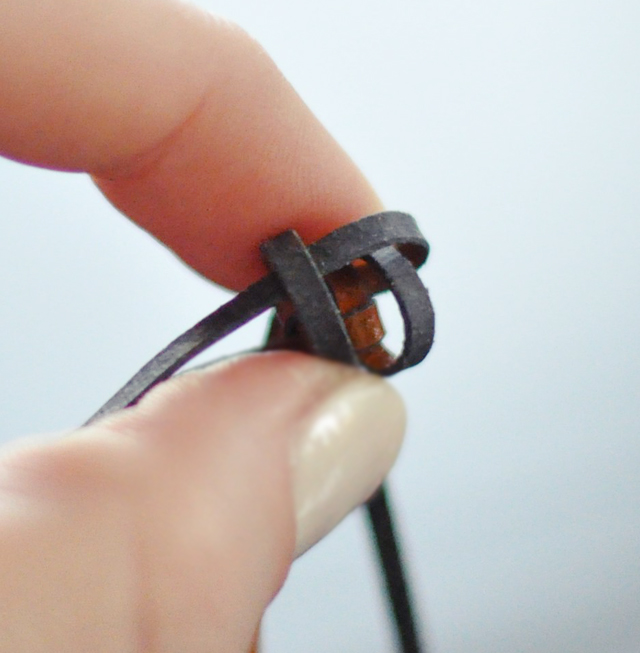
* To secure the end knot, leave your last box stitch loose then with each lace, loop around your nearest loop/under/up through the center ...all the way around. Watch video here ...trim your leather ends as much as you'd like. {also see last photo above}
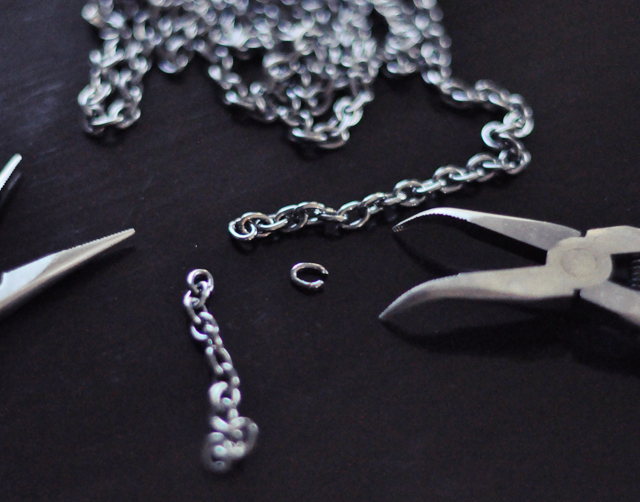
* Using your pliers, open a link in your chain . . .
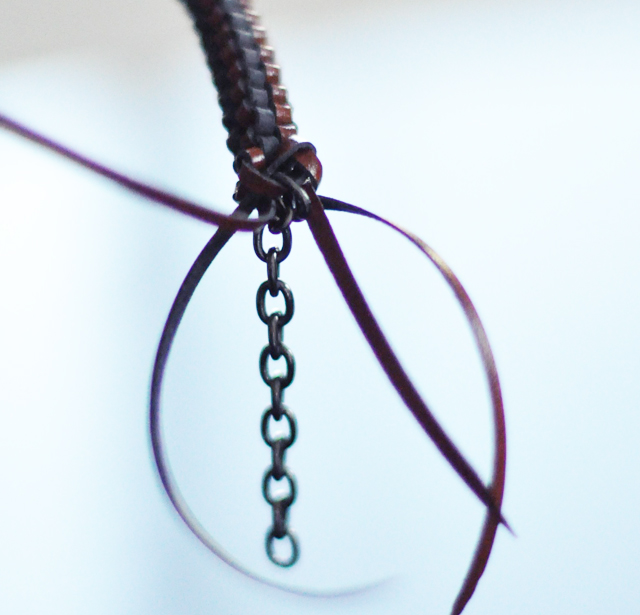
* . . . and loop it through one {or two} of the loops at the end knot. Add extra chain if you like.
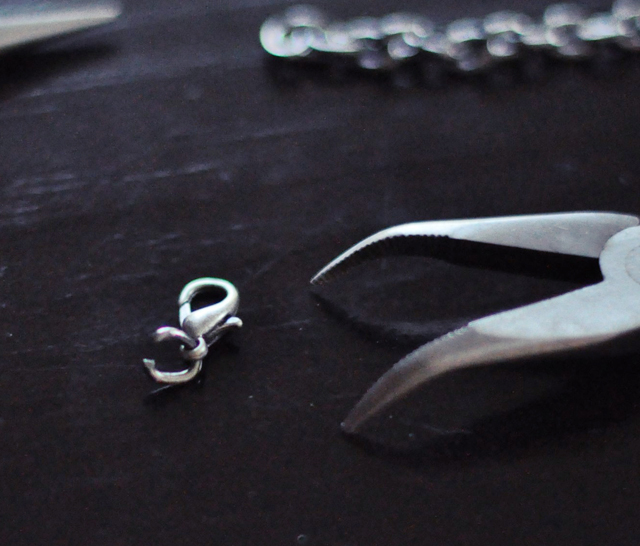
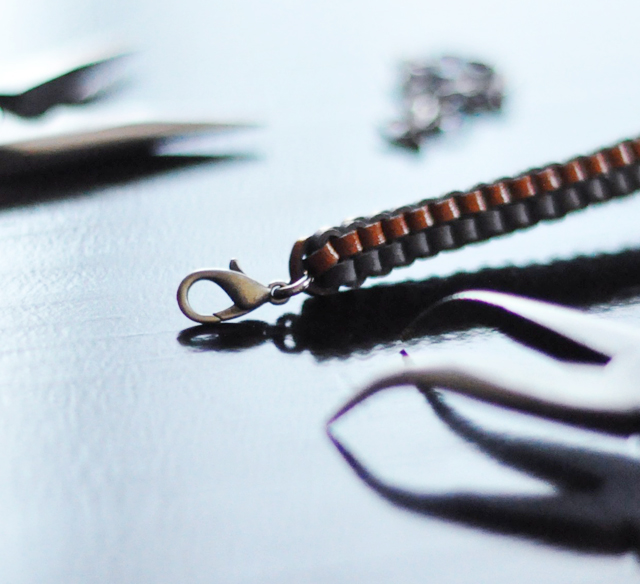
* Open another chain, add it to your lobster clamp and loop it through the top {opposite side} or your lanyard.
Have Fun!
Reader Request Maeg-it Yourself
Anthropologie Cluny Lace Necklace
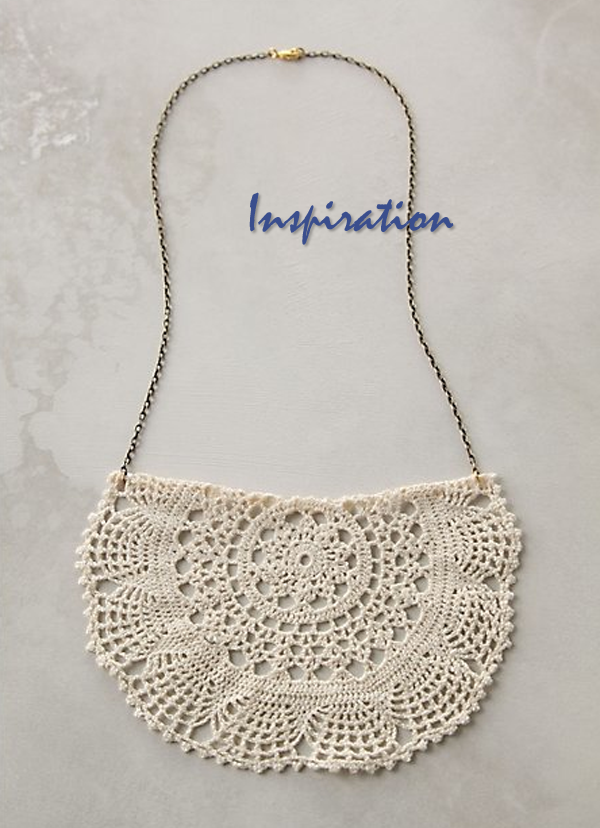
For my first Reader Request Maeg-it Yourself, I chose the Anthropologie "Cluny Lace Necklace" submitted by Mrs. May from This Lovely Day. Thank you Mrs. May, and Congrats! Email your whereabouts to lovemaegan@gmail.com and I'll send this dainty little necklace to you asap. I hope you like it ;)
And for the rest of you ...an easy DIY
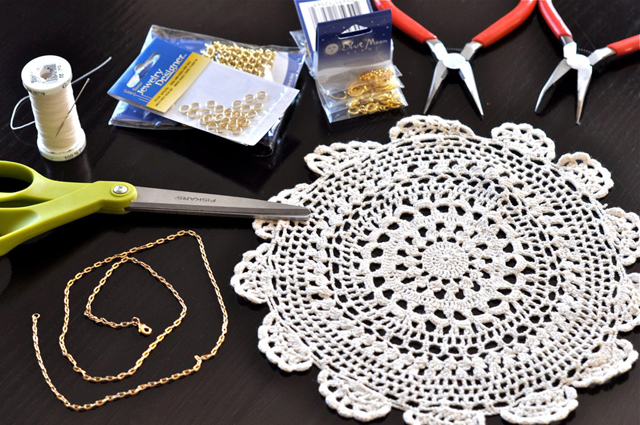
* I medium ivory doily. Any sort of crocheted doily will work, vintage, new, etc. I found this one at Jo-Ann's for $1.99
* Thin gold or brass chain, clasp, jump rings. {I used a chain I already had so I only needed 2 small gold jump rings}
* Beading or Needle nose pliers
* Scissors
* Needle/Thread in the same color
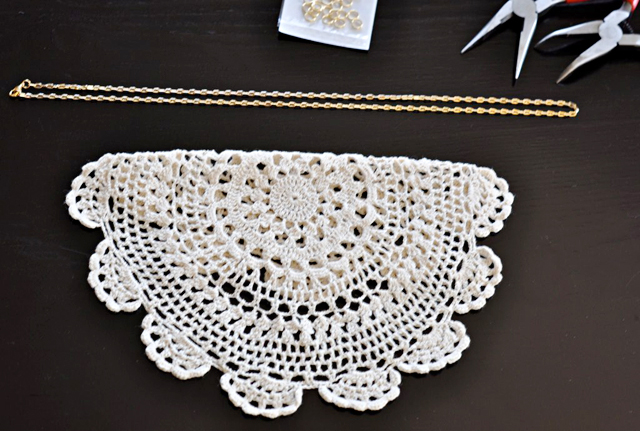
* Fold over doily and decide how much of it you'd like to use. Mimicking the Anthro version, I folded it just above the center circle ...using a little more than half.
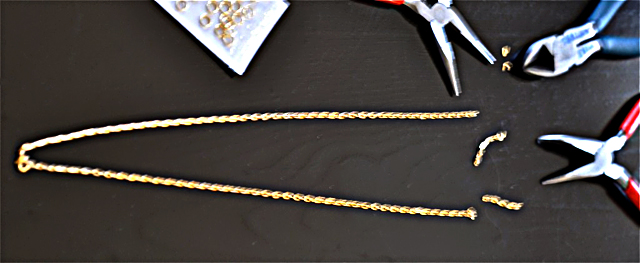
* If using a pre-existing chain, fold in half and using your pliers {or cutters} snip middle link off and remove. If you would like the necklace shorter, remove links equally on both sides. If you're creating the chain, measure out 21" and snip/pull apart links, then create two by separating another link at the half point. Using your beading or needle nose pliers, add the clasps at the ends of the two, creating one again.
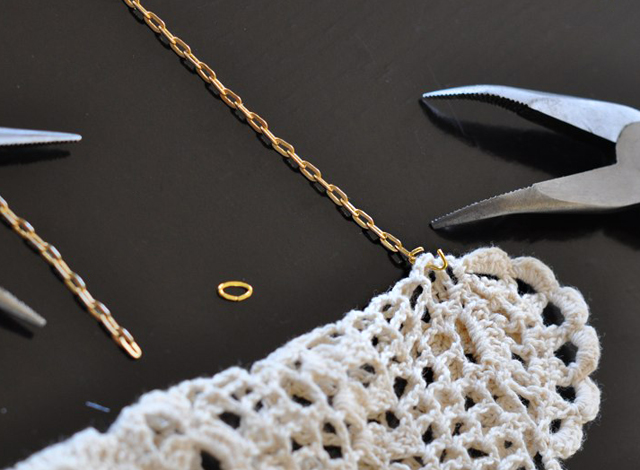
* Using your jump rings, attach one end of the chain to one end of the folded doily ...and the other to the opposite side. {face jump ring closures to folded over side, this will be the back}
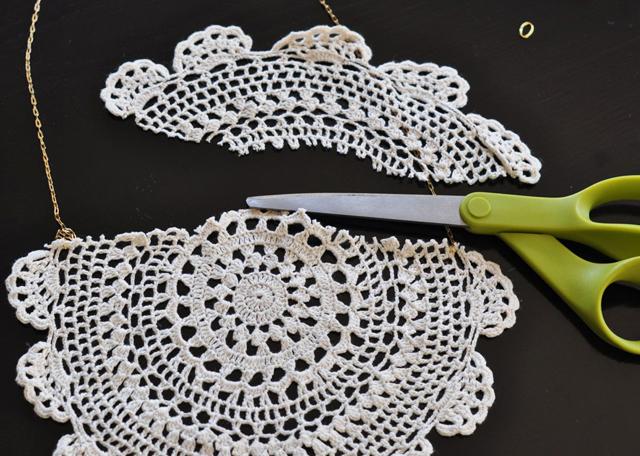
* Trim off the excess doily carefully, leaving enough to fold over and finish.
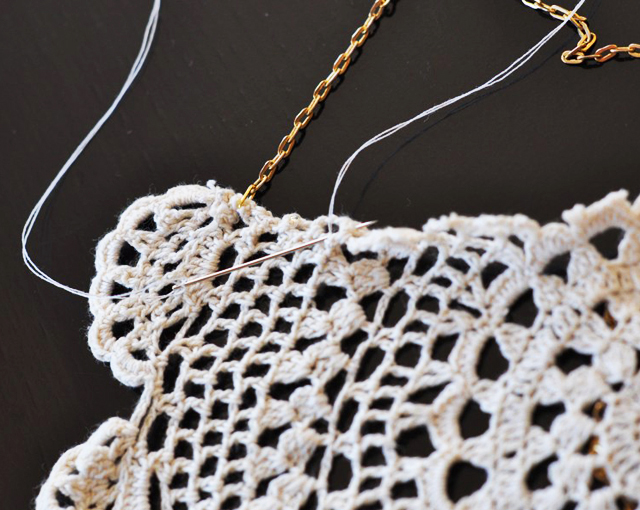
* Finish it off by carefully hand-stitching ends to the doily so they won't fray.
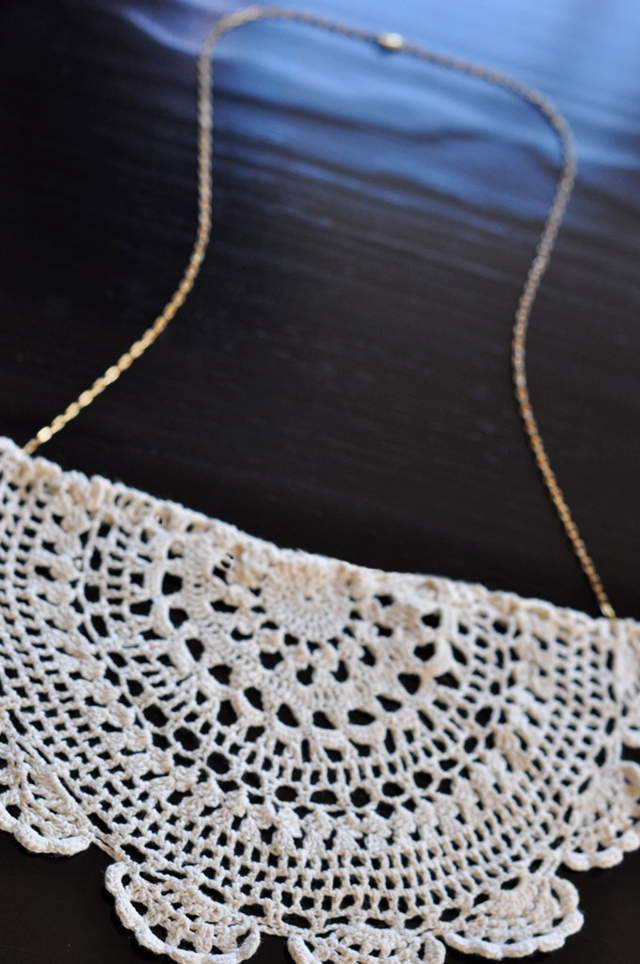
* It's rather delicate, really and pretty *
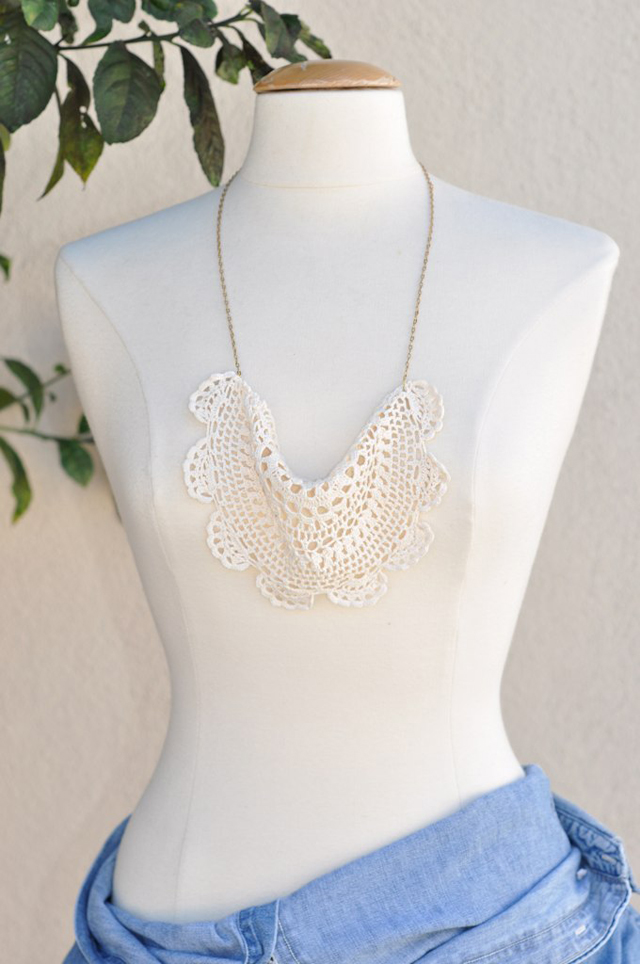
* Wear it long and drapey *
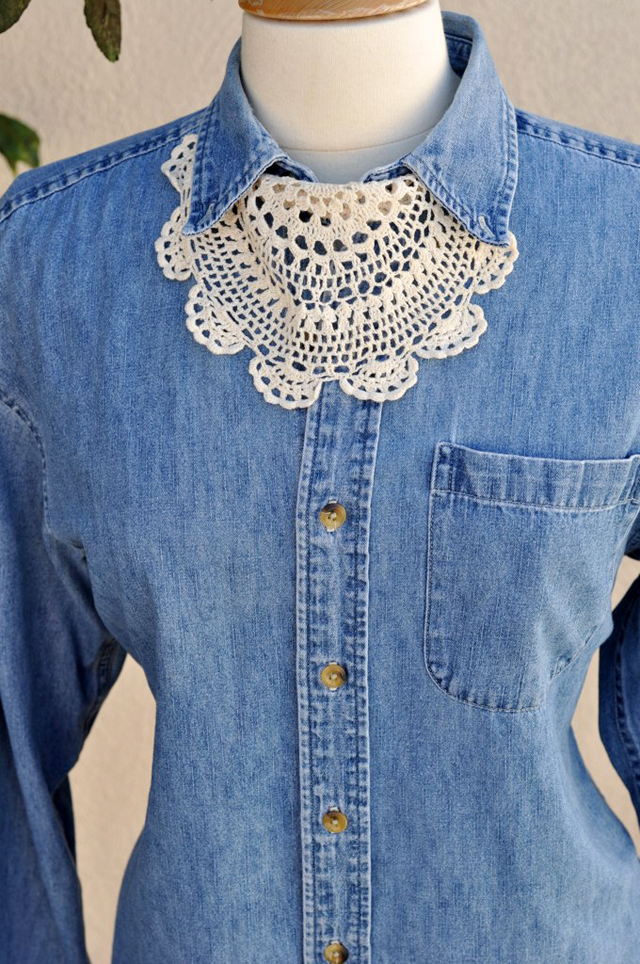
* Clasp it further down the chain & wear it at your neck *
While there were so SO many fantastic suggestions & submissions, given my time restriction on this one, I admittedly chose this dainty doily necklace because it seemed the easiest & quickest to recreate. It turned out so cute I may have to make one for myself too! This was SUCH a fun idea that I've decided to make it a weekly {or bi-weekly} feature ...yay! I will continue to go through your suggestions & hopefully choose yours next!
I've posted a button/link on my sidebar to the original submission post so if you come up with any new ideas you can easily come back and leave a new comment in that post. I'm still checking my Twitter & email too. Thanks for making this so fun!
Комментариев нет:
Отправить комментарий