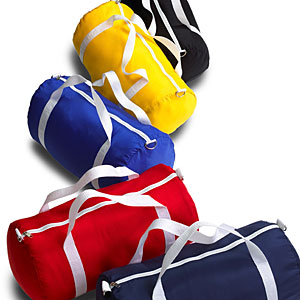
 A duffle tote is an ideal type of luggage that no traveler should be without. The duffel bag is one of the most versatile and functional forms of luggage. It can be used as a carry-on for plane trips, and can also serve as the perfect overnight or weekend bag. Duffel bags can be made in a variety of styles, designs, colours and fabrics. Therefore, anyone from a business traveler, to a camper, or everyday vacationer, will find use for a duffle tote bag.
You need:
- 1 heavy-duty closed plastic zipper
- 2 D-rings, 7/8″ wide
- 3 or more yards of polyester web strapping, 1″ wide
- 1 yard of canvas/upholstery weight fabric, 54″ wide
- Coordinating thread
- Tape Measure
PATTERN
The size of your duffel tote bag is based on the circumference of a circle. The larger the circle, the larger the bag. Look for a circular object to use as a template or use a compass. (I traced around a large pie plate).
Next, measure the circumference of the circle pattern using the edge of the tape measure. eg. a 9″ pie plate has a circumference of 28 ¼”.
Add 1″ to the circumference measurement. This is the bag height or X. (see diagram)
Now, to determine the width of the duffle, choose your desired zipper length. The longer the zipper, the wider the bag. (I chose a 22″ large-toothed plastic zipper). Measure the zipper tape, end to end, with the tape measure. This is the bag width.
Draw out a rectangle pattern (height x width).

Fold rectangle pattern in half and then each half again to quarter. Open the pattern flat.
Mark out strap placement lines on the foldlines closest to the ends. Allow 3-4″ free from top and bottom edges of rectangle pattern. (see diagram)
Cut the rectangle piece 1 time and the circular end pieces 2 times from your fabric on the straight grain.
ASSEMBLY
- Turn the top and bottom edges of the rectangle piece to the wrong side by ½” and press.
- Using the pattern as a guide, chalk the placement lines for the strapping on the fabric.
- Place the webbing over the placement lines and pin in place. Begin in the center of the center of the placement line and allow for the desired strap looping (I used 3 yds. of webbing and matched the colour to the colour of my zipper) then continue down the opposite end and allow the same amount as before for the strapping loop and finish where you started. You may overlap the ends together or “melt” the shorts end with a match to seal to prevent fraying of the webbing.
- Following the dotted lines on the diagram, topstitch the webbing to the fabric as shown. To reinforce the bottoms of the strap loop, sew an X through the webbing at each of the 4 points.
- Using a zipper foot, place one of the folded edges on top of the zipper tape with the zipper and face side of the fabric up. Topstitch in place.
- Then, place right sides of the fabric together and on the opposite folded edge, open the fold and stitch to the opposite side of the zipper. Open the zipper and face side up, topstitch the folded edge to the zipper. Close the zipper and stitch across the open end. You will have a “tube” shape.
- Cut 2 pieces of webbing 1″ long. Wrap each piece through a D-ring. Stitch each D-ring tab to the ends of the zipper tape with the D-ring facing the center of the tube.
- Divide the tube ends in quarters, beginning at the zipper position. Divide each circle into quarters.
- Open the zipper halfway. Pin the circle ends to each end of the tube following the quarter marks. Using a 3/8″ seam allowance, stitch in place. (You may have to clip the straight edge to sew into the curved edge to release any buckling of the fabric). Check for any uneven stitching then do a second row of stitching on top of the first to reinforce the seam. Turn the bag right side out through the zipper.
You can make a shoulder strap to attach to the D-rings if you desire.
Комментариев нет:
Отправить комментарий