DIY: D&G Inspired Love Letter Statement Necklace
 Who’s ready to head back to school? Thank goodness those years are long behind me. The best thing about going back to school was when my Mom would take me to Palais Royal for back to school shopping. Since I wen to private school and I was forced to rock a uniform, accessories were the only way I could really show my individual style.
I’m a big fan of the D&G Fall 2011 collection. It’s full of bright colors and this fun alphabet print that’s worked thorough out the entire collection. Click here to take a look. If I was going back to school I’d love to wear a few of these pieces on my first day. As usual, I was inspired by the D&G statement necklace and hit up my local hardware store to purchase some materials to create my own.
Happy Crafting! And good luck with the new school year to all my readers heading back to class.
 Materials: Chain, Rhinestones, Metal Hardware Letters
 Use the plyers to connect the chain and the rhinestone to create your necklace.
 Use large jump rings (you can pick those up at your local bead store) and attach the metal hardware letters to your chain.
 Workin’ my necklace on the streets of NYC last month! W-O-R-K…Work!
Тассел Ожерелье DIY.

Если вы посещали меня здесь какое-то время сейчас, вы знаете, что это не первая моя родео кисточкой кожи. Я сделал эти серьги прошлой зимой и этой тройной-х этажного бахромой колье весной и узнал кое-что, делая так.
№ 1: Не пытайтесь сделать свой собственный шнуровкой кожи за счет сокращения полоски кожи руки, когда вы можете просто купить ярдов и ярдов нарезанные кожаный шнурок на дешевые на Майклс. № 2: Не оставляйте кисти просто висит на ветру, так сказать. Я сделал это с ожерельем, что в прошлом я сделал вместо рисования нитей каждого кисточкой все вместе с небольшим количеством вышивки нитью. Они выглядят более аккуратными таким образом.
Мое вдохновение для этого ожерелья вышел из этого отсечения я вытащил из Бесплатный каталог Люди давным-давно. Я не могу найти ожерелье онлайн где-нибудь так вот мой сканированное изображение. (Говоря о свободных людей, я так топят, что я выиграл это бесплатно платье Люди сегодня из моих любимых мода блоггер Folake Хантун! Я никогда не выиграть ничего. Это чудо. Кроме того, я не говорю, что Folake это мой любимый просто потому, что Я выиграл.Престола. Она является законным моей реальной жизни икона стиля.)

Вот то, что я использовал:

Кроме того,
- Небольшие плоскогубцы
- Ножницы
- Пару ярдов вышивка нитью в цвет по вашему выбору
1) Вырезать 10 "полоски кожи кружева. Вы будете нуждаться в трех из этих полос, чтобы сделать один кисточкой. Мое ожерелье состоит из семи кистями на нем, так это означает, что я вырезал двадцать один 10 "штук. Чтобы создать кисть, сложите три части пополам и оберните один конец вашей headpin вокруг раза, с помощью плоскогубцев для обеспечения headpin и зажмите его в кожу.

2) Добавьте ваш бисер на конец headpin, что вы оставили торчит. Затем цикл вашего headpin так что вы можете использовать его для обеспечения кисточкой, чтобы ваше ожерелье.Повторяйте, пока не создали столько кистями, как вы хотите быть на вашем ожерелье. Затем с помощью небольших вышивку нитью, чтобы собрать все нити вместе и узел плотно.

3) Повторяйте, пока не сделали столько кистями, как вы хотите.

4) Начало обмотки длина кожаный шнурок вокруг вышивки обруч. Вы можете просто выбросить внутреннее кольцо, которое поставляется с обручем. Нам просто нужно большое внешнее кольцо с оборудованием на ней. Оберните кружева плотно пока не дойдете до конца.Крепится с помощью узла. Деревянным обручем естественно красивым и эластичным и легко помещается и комфортно на шее, без необходимости быть обеспечены с винтом (или что-нибудь), чтобы оставаться на месте.

5) Затем дважды узел каждого кисточкой в Ваш 'воротник' с некоторыми более вышивка нитью. Клип все свободные темы вышивания мулине, и все готово!

diy: Placemat Envelope Clutch

You know you DIY too much when you look at a placemat and think of accessories...not food, tables or eating.
I visited my cousins in Canada a few weeks ago and found a burgundy, pyramid-stud-looking placemat at the dollar store. It was only a $1.25 CND, and the USD conversions aren't that far off. Because I had everything else on hand, the finished product cost me almost nothing. I saw it and automatically thought "CLUTCH!"
I visited my cousins in Canada a few weeks ago and found a burgundy, pyramid-stud-looking placemat at the dollar store. It was only a $1.25 CND, and the USD conversions aren't that far off. Because I had everything else on hand, the finished product cost me almost nothing. I saw it and automatically thought "CLUTCH!"


Supplies:
- Ruler
- Sharpie/marker
- Jewelry pliers
- Button of your choice. You can also use an old earring, pendant, etc.
- Wire cutters (depending on the button you're using)
- Magnetic purse closures (available in the sewing section of the craft store)
- Scissors
- E6000/super glue
- Flat button, or a button with a shank on the back (to be removed)
- Placemat
- Thick fabric, like vinyl or pleather. About 12x12 inches.
- Thiner fabric, like cotton or jersey. About 12x12 inches.
- Sewing machine & coordinating thread (not shown)
- Denim needle (for your sewing machine)
- Sewing pins
- Scrap paper
- White chalk or charcoal (might be useful)
I was going to use an elephant button, but changed my mind for a flat gold button that'd be easier to work with. Reason #32487648162 DIY is great: you can change your mind whenever you want.
For my additional fabrics, I used black pleather from Mood and black jersey from an old t-shirt.
Obviously, the final look of your clutch will depend on what kind of placemat you find. I'm sure Canada isn't the only place to find cool looking placemats, so try checking out stores like Home Goods, TJ Maxx, and Target. Your local dollar store is always worth a shot, though. Just make sure the placemat is thin enough to be sewn through two layers.

Closeup of the magnetic purse closures. They have prongs that can be bent in with pliers, to secure to fabric.


1) Fold the placemat in half, front sides facing each other. Draw a line on each side; you'll be sewing down these lines later on.

2) Place your placemat on a piece of paper. Find the midpoint, draw a line, and connect the top of this line to create a triangle like above. Make sure the "bottom" of the triangle has a good inch or so extra.

3) Cut out your pattern.

4) Place the pattern on one of the pieces of fabric, and measure an inch extra all around.

5) Cut out.

6) Repeat with the other piece of fabric.

7) Front sides facing each other, sew the two pieces together - EXCEPT for the bottom (not at the very edge, but right below the one inch marks. I didn't take a picture of this, so sorry!).
Flip it right side out, fold in the open ends of the bottom, and pin together. Sew this shut.
Flip it right side out, fold in the open ends of the bottom, and pin together. Sew this shut.

8) Pin the flap to one side of the placemat.

9) Sew the flap to the placemat.
Fold the placemat in half, right sides facing each other (just like you did in Step 1). Sew along those marker lines you drew, then turn the entire thing right side out.
Fold the placemat in half, right sides facing each other (just like you did in Step 1). Sew along those marker lines you drew, then turn the entire thing right side out.

10) Pierce two holes in the flap of the clutch. I'd recommend placing this on an old magazine, so as to not damage your table/desk/etc. Insert the prongs of one end of the magnetic purse closure, and bend in with pliers.
Repeat this on the placemat side, for the other end of the magnetic closure. Make sure they'll line up before making any holes (white charcoal or chalk might come into handy for marking lines to guide you when piercing holes).
Repeat this on the placemat side, for the other end of the magnetic closure. Make sure they'll line up before making any holes (white charcoal or chalk might come into handy for marking lines to guide you when piercing holes).

11) If needed, remove the back of the button.

12) Glue onto flap, covering up the prongs of the magnetic closure. Let dry.


New clutch for less than $2? I'm okay with it.
simply spray diy: Striped Tie Dye Tank

I had no idea fabric spray paint existed - so when the crew at Simply Spray asked me if I wanted to try out this project, I was all for it! It's easy, quick and simple - and I happened to have a tank top very similar to the one they used.

(click to enlarge)

I used black (c/o Simply Spray) - but it's also available in other colors.
It totally reminds me of zebra print! Mine ended up bleeding; I don't think I waited long enough to take it off the bucket. I actually like the bleeding though, so if you want to go for that look, only wait a few minutes like I did. If you want finer lines like in the tutorial, then wait a little longer.
I'm trying to brainstorm a few more projects using this fabric spray paint, because I'm really liking the concept of it. If you have any suggestions, let me know!
I'm trying to brainstorm a few more projects using this fabric spray paint, because I'm really liking the concept of it. If you have any suggestions, let me know!
bella diy: Studded Shoulder Top

I love love love basics. Maybe it's because they're so easy to customize, or maybe because I know they'll match with everything. Either way, I like my basics to be well made and comfy. If you're the same way, check out Bella - I love the aesthetics of this brand. Their clothing is simple but sexy, providing the perfect base for making it completely your own.

I was given the chance to DIY some of my favorite pieces from Bella's line, and here's the first one! This is more a styling idea than a how-to. Any fashion DIY'er has probably studded a few - or a lot - of things by now, but this idea creates a gradient of studs on the shoulder. The fierce spikes bring different twist to the loose fit of the dolman top.

I used Bella's lightweight relaxed long sleeve dolman tee in Pebble! It's sooo comfortable.

I also used cone studs (crustpunks.com & studsandspikes.com are both great places to buy studs). Regular cone studs are pictured here, but I ended up use tall cone studs. A little 'louder' than regular cones!
You'll need 32 total, 16 for each shoulder. You'll also need round nosed pliers.

1) Find the seam on the side of the sleeve. You'll start studding along that seam.

2) Carefully insert the first stud on top/along the seam.
The prongs will pierce through the fabric, like above. Bend the prongs in with the pliers.
Because you're not working with a leather or a coat, you don't have to use a lot of force while doing this. Pushing too hard will create too big of a hole that's likely to rip, so be gentle.

3) Keep studding until you have 4 studs along the seam.

4) Add 3 studs on each side.


5) Add 2 studs on each side.

6) Add 1 stud on each side.
You can add more if you'd like, but adding too much might weigh down the sleeves. I found 16 to be just right, though!


I'm thinking this will be one of my favorite pieces this fall.

My next Bella DIY will be with their triblend sponge fleece zip hoodie. I'm in love with their hoodies, so this should be a fun one.
xo!
diy: Tye Dyed Lace Strap Tunic

First off: This can either be a tunic or top, depending on the size and fit of the tank top you used. I decided on a Men's shirt that I've had for a few years, so it fit like a tunic on me. You can use an oversized or true-to-size tank top...whatever you'd like! Just make sure it's white, or a pale/light color.

Supplies:
- White or light colored tank top, cotton
- A bright colored dye, for the accents (I used RIT Dye in Wine)
- A darker colored to dye, to overdye (I used RIY Dye in Navy Blue)
- Lace trim that is about the same width as the tank top's straps
(I purchased mine at M&J Trimming's Manhattan store)
- Rubber bands
- Scissors
- Sewing machine or sewing needle
- Coordinating thread
- Plastic tub (one big and one small), water, rubber gloves (not shown)
- Access to the washing machine and the outdoors!
(Also not shown, obviously)

Before you start, double check that your lace trim is about the same width at some point along the strap.

1) Head outside, prepare the brighter dye (in my case, Wine) in a big plastic tub. Submerge your top and let the dye really soak in. Don't forget to wear those rubber gloves.
Throw the top into the wash; a fairly short cycle should do.
Throw the top into the wash; a fairly short cycle should do.

2) Let it dry for a bit, then randomly tie rubber bands around the shirt. Prepare the darker color - in my case, Navy Blue - in a smaller tub.

3) Dip dye away.

4) Let the shirt soak in the dye, letting it naturally bleed throughout the shirt. You still want to make sure the brighter color underneath is showing up in certain spots.

After some more dipping, dyeing and bleeding.

5) Throw it in a plastic bag and tye it up, then let it sit for about 30-40 minutes. When that's over, take off the rubber bands, throw it in the wash for another short cycle, and hang it up to dry.

My finished product...almost.

6) When dry, determine the placement of your lace trim along the strap. If your trim is scalloped/decorated on one side like mine, make sure that the "right" side of the lace is facing the front side of the shirt.
Cut the strap about half an inch ABOVE this.
Cut the strap about half an inch ABOVE this.

7) Pin the lace to the strap. If the strap is wider than your lace, you can always make a small pleat when you sew. What matter the most is that the right and left edges are sewn together (indicated by the yellow pins).

8) Trim the lace, depending how long or short you want your strap to be. It's better to cut off too little than too much at first!
Sew the lace. Repeat on the back, and then on the other strap.
Sew the lace. Repeat on the back, and then on the other strap.
This is how mine ended up. I love the way the Navy Blue looks against the wine. Remember making that pleat in the middle of the strap (if needed?) - you can see it if you look closely at both straps.
I wore it over a black tank top, a vintage blue waist belt, and even though you can't see them - black denim shorts.
I wore it over a black tank top, a vintage blue waist belt, and even though you can't see them - black denim shorts.

The material is light enough for the summer, but still wearable for the fall. It's a good thing I don't have a boyfriend to steal white tank tops from, otherwise they'd all end up like this.
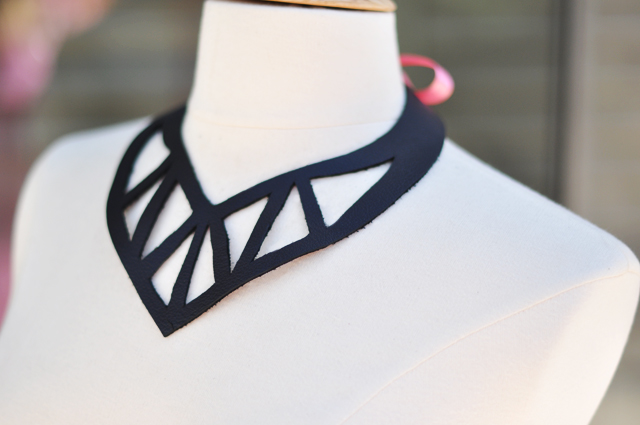
Leather Cut-out Statement Necklace DIY
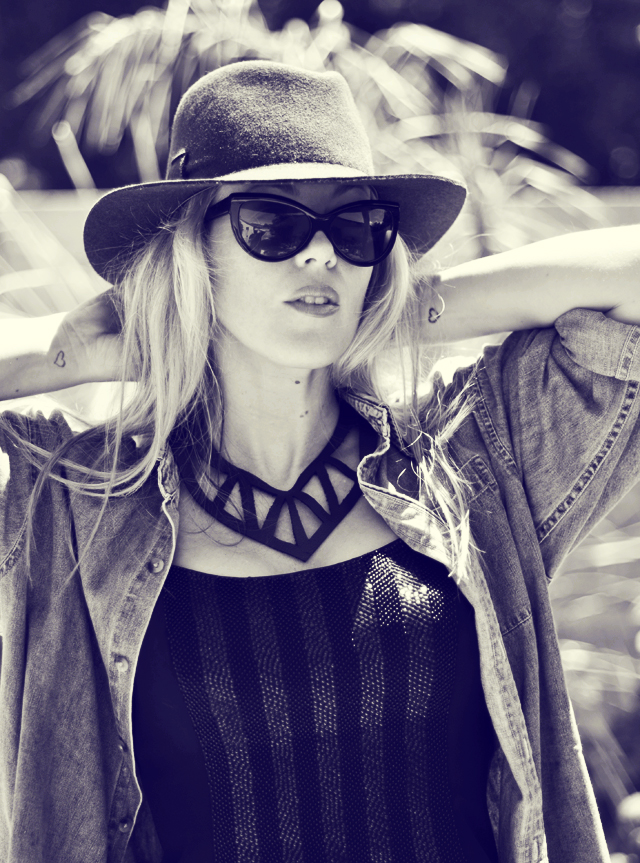
It's a little known fact that I worked with a leather accessory designer for 7 long years and needless to say, I know more about leather than anyone in their right mind needs to know. When I use leather for a DIY now it's a bit of a surreal experience because I never thought in a million years I'd be working with it again. But alas, leather always comes back in style and leather accessories are the easiest way to add a little edge to an outfit without biting the entire leather bullet. So I give you, my {easy} leather cut-out statement necklace tutorial.
* Hat custom made by Etsy shop Spring Canyon Hats. You can get the same one by contacting them and custom ordering the "...love Maegan "Barracuda" Fedora hat"

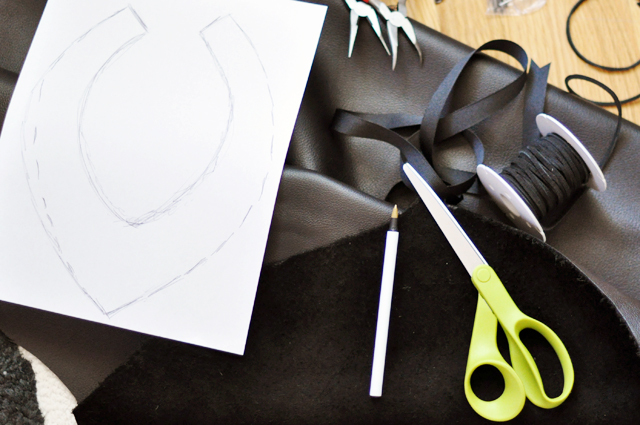
* Leather
* Scissors/Razor blade
* Pen/Paper
* Ribbon or leather for closure ...or if you're skilled you can use an eyelet or d-ring and metal jewelry closures. I took the easy way out.
* Also note: I played around with adding chains or lace peeking through the cut outs but left it as-is for now. I may add to it at a later date but I like the simplicity.

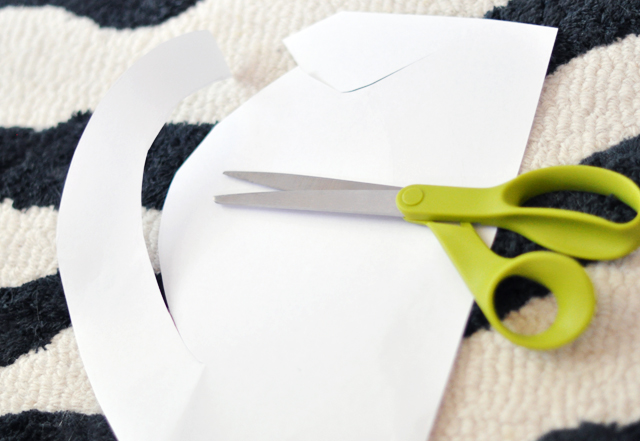
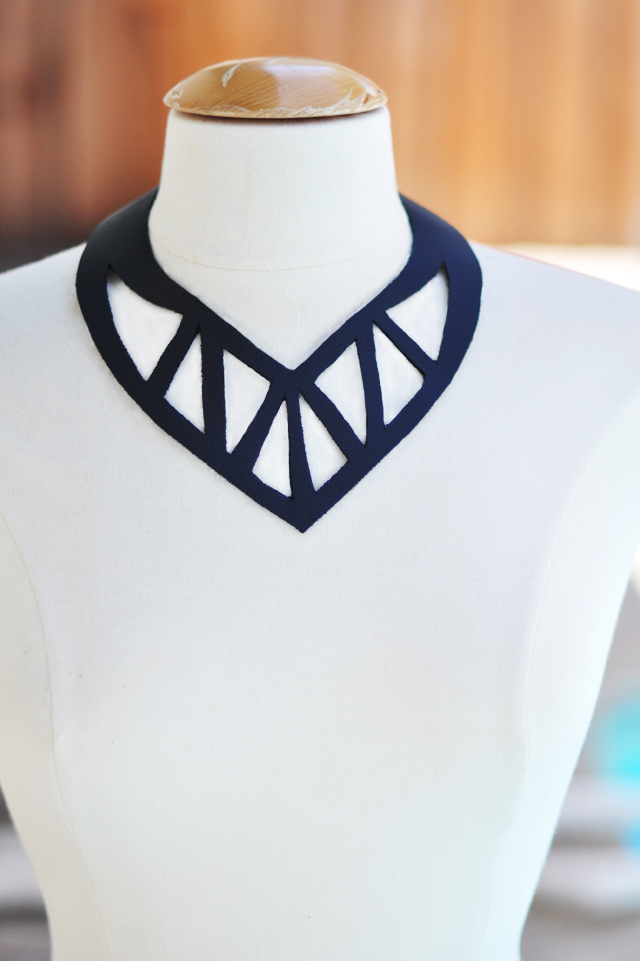
* Sketch your necklace freehand or use another necklace as a pattern. Cut one side out.
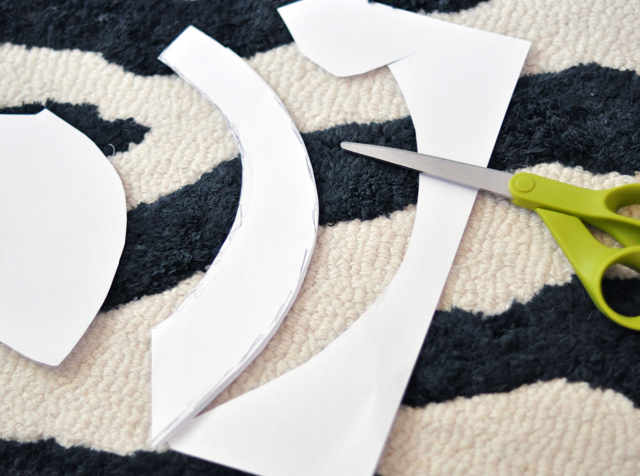
* To create a mirror image of my shape, I cut out one side then folded it onto the other, using it as a guide to cut the other side.

* Try on your paper pattern to make sure it lays the way you want it to around your neck. Make any necessary adjustments. * Trace your pattern onto the suede side of your leather.
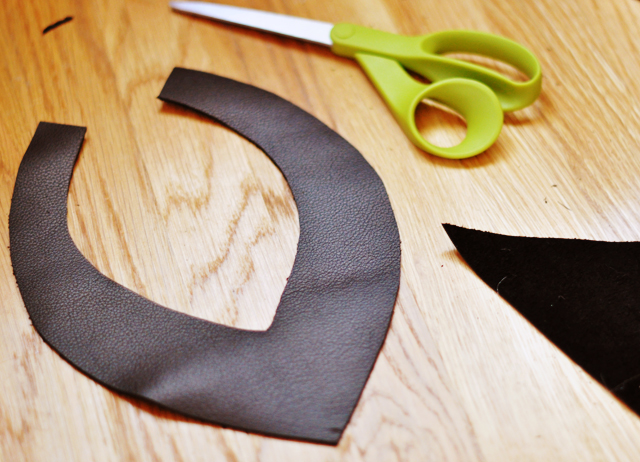
* Cut out your pattern. If your leather is thin enough, you can easily use scissors.

* Using a light pencil on the suede side, draw on your pattern. I just eye-balled this but if you want a more intricate pattern, you may want to draw it out or use your computer to get it precise.
Pattern design ideas: Mila Necklace and Earrings Gabriela Iskin, 2010, Pamela Love at Bona Drag
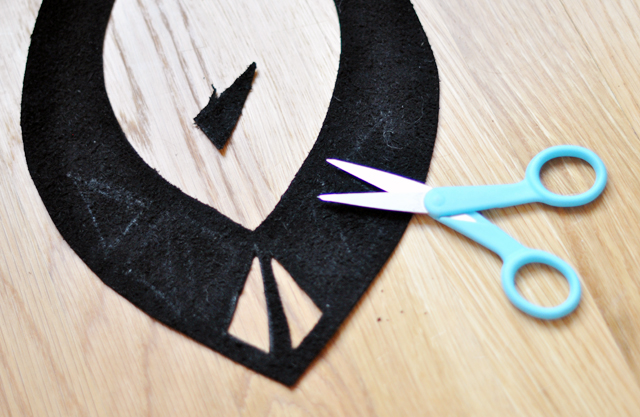
* Cut out your design. It's best to use a razor/exacto blade but I couldn't find mine so I CAREFULLY used my sharpest little scissors.
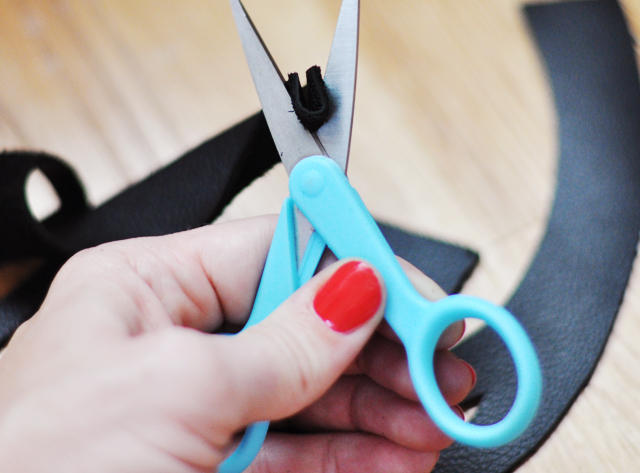
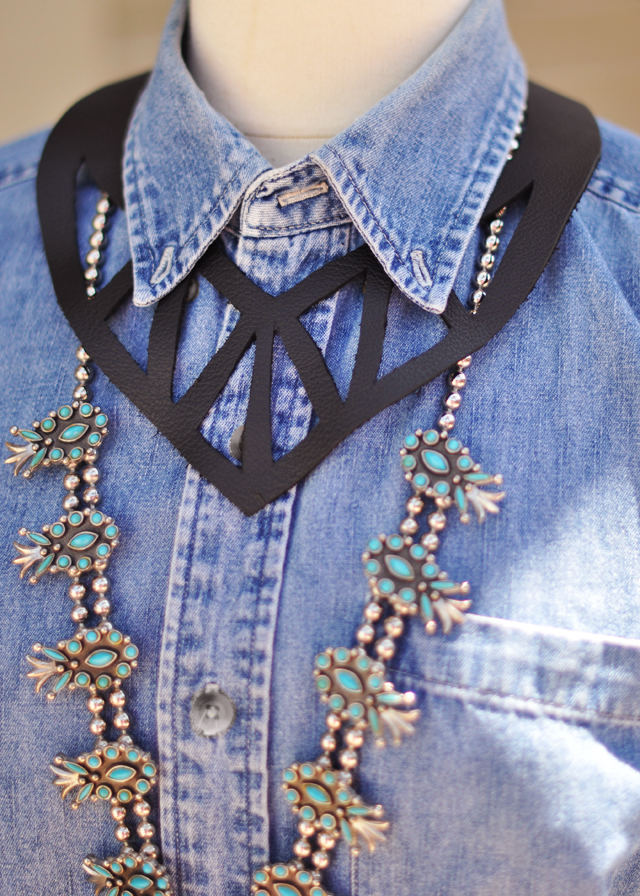
* Make a slice on either end of your necklace, parallel with the edge, about a half an inch in.
* Like this.

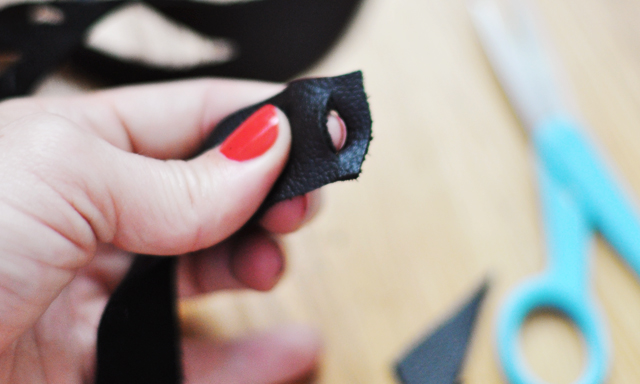
* Slide ribbon or leather lacing through {I used pink to demonstrate}. If you're skilled you can obviously create any kind of closure here.

all post awesome...
ОтветитьУдалитьclick it...: http://www.weaveron.com/