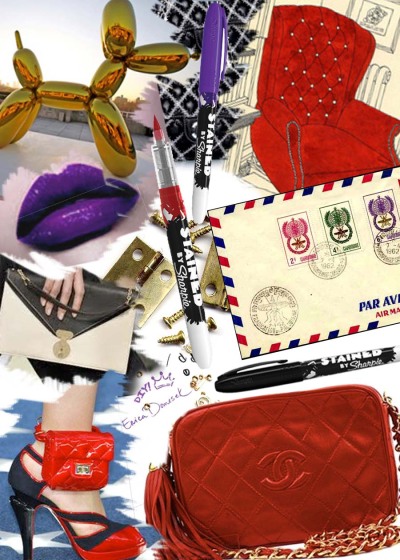
Make your mark in the world… with a marker! Introducing Stained by Sharpie. Sharpie’s first ever fabric marker allows you to scribble, draw, color and stain the day away. My love affair with the iconic brand is no secret. I was honored by being chosen to “start something with Sharpie”, partnering in the exciting launch. A DIY clutch was in order. This season, everyone who’s anyone is joining the clutch craze. It’s timeless, stylish, and wreaks of chic.
P.S.- CHECK OUT THE BEHIND THE SCENES CLUTCH CREATION VIDEO!
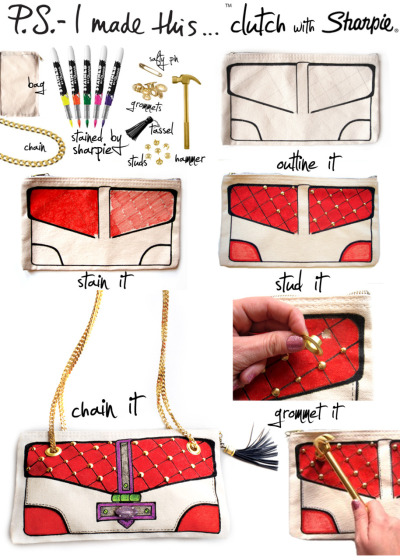
To create a clutch using Stained by Sharpie, outline a canvas bag using a ruler for straight lines, and add your own desired details. Begin shading in top flap and continue to fill in using different pressures to create a lighter or darker shade. Use a ruler to measure equal lines and create quilted effect (Approx. 1”). Outline diamond quilting and add stud. Place studs where lines intersect, and add stitching detail with dotted straight lines around the border. Next, cut slit for grommets, aligning on both sides and hammer together. Purchase a grommet kit for this step. Feed chain through all four grommets, using safety pin to join ends of chain (or simply connect with pliers). Add a fun tassel and “stained” faux hardware inspired by the fab clutches seen on the runways this past season. Finally, Glue a gem or bauble on for the finishing touch!
P.S.- A DIY CHALLENGE FOR YOU: START SOMETHING WITH A SHARPIE. UPLOAD YOUR DESIGNS ON SHARPIE.COM!


JUL 22
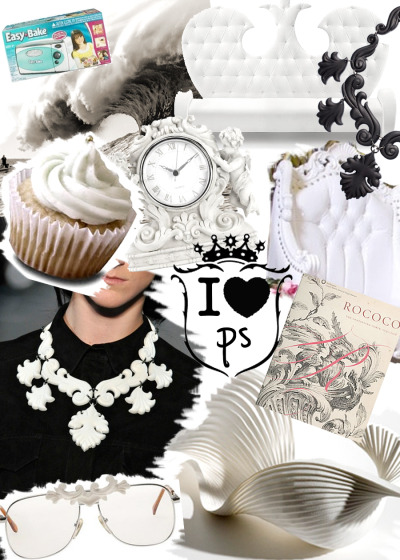
PS- It’s a heat wave, and nothing is hotter than Proenza Schouler. We look to Jack and Laz each season to get swept away in their chic world that’s full of oooooh’s and aaaaaah’s. The designing duo’s inaugural costume jewelry collection is Perfectly Stunning. In one word: J’amazing, actually. The whimsical mash-up of baroque and modern flair is a must have this season. I cannot dream up anything more magical, and my partners in crime, WHO WHAT WEAR agreed! PS- I’d be lost without PS!
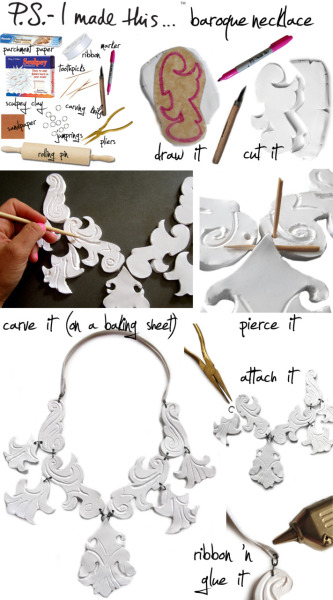
To create a baroque-styled necklace: Slice and roll out 9 pieces of clay. Each piece should be rolled out to approx. 1/4/ inches. Once rolled out, draw each pendant pattern onto parchment paper for each shape. Place pattern on top of clay, and use carving knife to trace around the pendant drawing and gently pierce through the paper, cutting the entire shape out of clay. After each piece is cut, carefully place onto a non-stick baking tray laying pieces just as the final version will look. PS- Be sure to match the pendants very close to one another in order for the jump rings to be able to connect. Use a toothpick and/or chopstick to carve detail ridges in pendants by gently pressing into the clay, making soft, curvy detailed lines. Using a toothpick, poke holes into pendants. Be sure all holes line up perfectly before baking and make sure they are big enough for the jump rings to fit through. Bake in oven at 275 degrees for 15-20 minutes. Bake time may vary depending on oven. Let cool for an hour. Use a lightweight sandpaper to smooth out outside edges, and achieve a clean, soft look on top. Use pliers and connect each pendant together with jump rings. To finish off, loop ribbon through the end jump rings and glue to finish off.
JUL 11

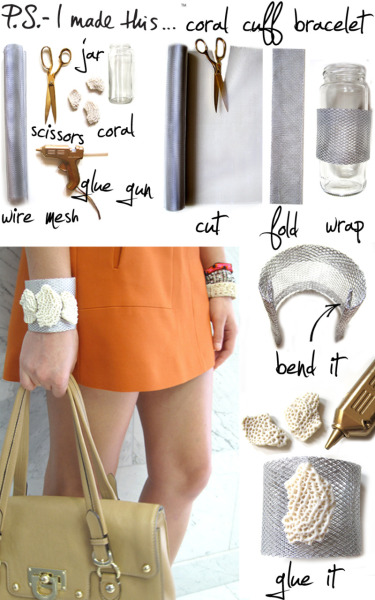
Dive, snorkel, and scour for coral! The branchy marine organisms are sea-tasticly chic. Studied by Marine Biologists and incorporated into our fashion and interior Icon’s designs, coral elements continue to inspire and intrigue us all. As the father of the Sea, Jacques Cousteau once said,“when one man, for whatever reason, has the opportunity to lead an extraordinary life, he has no right to keep it to himself.“ In the spirit of the sea, sharing, and helping to make lives more beautiful, it’s time to get your DIY on. Next beach stroll, be sure to collect your thoughts and pretty pieces of coral to create this j’amazing cuff.
It’s on: Collect your coral treasures! Cut and fold mesh wire (traditionally used for sculpting) into your cuff. Create the cuff shape by wrapping around a glass that is comparable to the size of your wrist. After achieved size and shape is reached, fold the sharp edges back about one inch. This will soften the ends of cuffs and keep the wire from poking into your skin. Using your glue gun, apply small dabs of glue to coral (not too much- it will ooze through the wire), and place onto the cuff. Hold for a few seconds till set. Get creative with sea-life combinations. Weave string and shells for an ever bolder cuff. Yes to coral. yes to cuffs. Get involved!
PS- IF YOU LOVE CORAL, SHELLS, AND CREATURES GALORE, YOU MUST GET THE CABINET OF NATURAL CURIOSITIES BOOK!
JUN 30


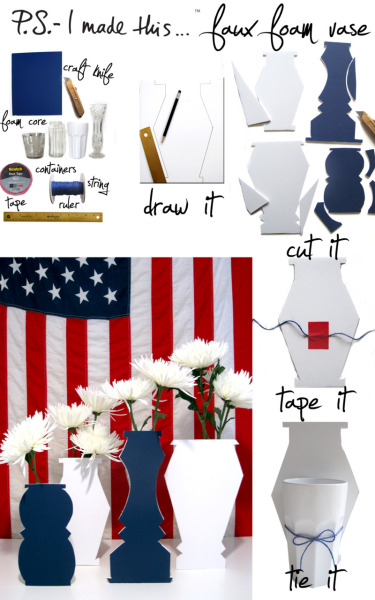
Declare your Independence DIY Day! From the backyard BBQ’s to beach blow-outs, boasting your red, white, and blue for July 4th is the thing to do! Hand over heart, it’s all about art- so get involved. Create a cool, creative, and craftastic centerpiece for your July 4th fete.
Its On: Draw your desired “vase” shape onto foam core - available at most art stores, and office supply stores like STAPLES. Be sure to do a few practice sketches before taking to the foam core. Get creative with your shapes, sizes, and colors. Mixing and matching will make an eclectic display. Use a craft knife (be sure the blade is sharp!) and make slow, steady, and smooth slices on the “vase” outline. Be sure you’re cutting on a board to protect the surface underneath. If there are some shaggy and not so clean edges, clean them up after your shapes are cut out. Tape a string (or ribbon) onto the back of your foam vase and secure it to the front of a container, by tying a secure knot or bow. Re-purpose jars from the kitchen, drinking glasses; whatever’s clever! Fill the containers with sweet smelling fresh flowers and display vases on a table for an unexpected and delightful centerpiece.
If you bleed red, white, & blue- I think this DIY is for you. God Bless amERICA!
Комментариев нет:
Отправить комментарий